AdBlock Plus – Stop Seeing Advertisments When You Use Internet

Surf the web without annoying ads!

  • Can block tracking, malware domains, banners, pop-ups and video ads – even on Facebook and YouTube

  • Unobtrusive ads aren’t being blocked in order to support websites (configurable)

  • It’s free! (GPLv3)

Be the first to experience the new Adblock Browser for smartphones and tablets. Get it here.

About Adblock Plus

What is Adblock Plus?

Adblock Plus is a free extension that allows you to – among other things – block annoying ads, disable tracking and block domains known to spread malware. Available for Android, Chrome, Firefox, Internet Explorer, Maxthon, Opera, Safari and Yandex, Adblock Plus uses filters that you choose to block all unwanted elements.

Created by Wladimir Palant in 2006, Adblock Plus is an open source project. In 2011, Palant, together with Till Faida, founded Eyeo to make its development sustainable.

How does Adblock Plus work?

Adblock Plus itself has no functionality; it doesn’t block anything until you “tell” it what to block by adding external filter lists. Filter lists are essentially an extensive set of rules that tell Adblock Plus which elements of a website to block. You can add any filter list you want. For example, block tracking or malware. You can also create your own filter lists. Almost all filters are open source, therefore many filter lists have been created by Internet users.

Filter lists enabled by default include:

  • An ad-blocking list selected based on your language (EasyList)
  • The Acceptable Ads list

These are enabled to get you started. You can remove them or add others – it’s up to you.

EasyList corresponds to your browser language and is aimed at disabling ads that are considered to be intrusive by our community of users. Eyeo GmbH did not draft EasyList and therefore has no right to, or control over, its content. Visit the EasyList Community for more information.

The Acceptable Ads list displays ads that comply with the acceptable ads criteria agreed upon by our community of users. The list is maintained by Eyeo GmbH.

What are Acceptable Ads?

We don’t think all ads are bad and are fully aware that ads finance many websites. So, in 2009 we decided to find some common ground. Our solution involved asking Adblock Plus users, and our community at large, to help identify criteria that makes for better ads. From these discussions, we established strict criteria to identify nonintrusive ads. In 2011, we began implementing the Acceptable Ads initiative. Participants that wish to comply with the Acceptable Ads initiative can apply to be added to the Acceptable Ads list. Adblock Plus users have the option to display ads that are on the Acceptable Ads list or to disable the Acceptable Ads feature and browse completely ad-free. To view the list of acceptable ads, visit the Acceptable Ads Proposals forum.

Please see the Acceptable Ads FAQ to learn more.

How to Make Money Using your iPhone or iPad

Top iPhone and iPad apps to Make Money

So, here are the apps which you need to grab for your iPhone or iPad in order to start making money from your iPhone. Simply go through the list, read out the descriptions and then decide that which app is best for you and start know that how to make money using these apps.

Field Agent

The Field Agent is the first app which you may use for making money. It gives you some tasks which you need to complete within given time and then you’ll be paid in return. They give certain physical tasks in which they might ask you to go out and collect some sort of information near you and all that. They have paid around $16 Million till now.

You may be paid from $2 to $12 for completing each task. It is available for entire world. If you want to grab this app then you can easily download it for your iPhone or iPad from this Link. Grab it and start making money.

Perks

The Perks is another most prominent app which could be used for making money using your iPhone or iPad. You need to earn points in this app by shopping, viewing videos and sharing stuffs. Ones you have earned enough points then you can easily convert those points into cash or other rewards.

You can have almost 3,000 stores in Perks which you may approach for your shopping and on the same time you’ll be earning points. It is complete pack where you can explore some real awesome stuffs. If you want to get this for your iPhone then grab it Here.

NPolls

The NPolls is money making app which help you to make money by completing surveys. You need to create your poll, ask questions to the world, people will answer you and in return you’ll earn money. We would recommend you to create something happening surveys and polls in order to drag the attentions of many users.

You will be rewarded $10 for completing one survey for first 50 surveys. You can withdraw your amount or earning via PayPal, an online payment marketplace. If you want to get this app for your iPhone or iPad then download it from Here.

EasyShift

The EasyShift pays you for shopping, eating and exploring in your city. It is simply about researching stuffs around take photos and all that. After completing the task you’ll be rewarded. They mostly made payments within 48 hours via Paypal ones you reach the threshold. If you want to get this app for your iPhone then you may easily grab it Here.

Pact

The Pact is the last app which you may use to make money using your iPhone. It is health related app in which you need to set a certain healthy schedule for yourself and then you need to work according to it if you could meet that then you’ll be paid if you could not then you have to pay others. Additionally, you’ll be asked that if you could not meet the Pact then how much you’ll pay to others.

It also allow you to track your weekly progress and work accordingly. Ultimately, they pay you for staying healthy. Isn’t awesome? You’ll paid in both a healthy life and some rewards. If you want to get this for your phone then grab it Here.

How to Update Your Android Phone Or Tablet | WikiHow Solutions

Updates for your phone or tablet can be exciting events. They usually bring new features and functionality, as well as increased performance. Your device normally informs you when an update is available, but these messages can be delayed. If you know an update is available and you need to get your hands on it ASAP, follow this guide.

Steps

  1. Update an Android Step 1 Version 3.jpg
    1
    Backup your device. While updating your Android OS is usually a painless process, there is a small chance that your device may crash. To protect against this, ensure that your device is properly backed up.
  2. Update an Android Step 2 Version 3.jpg
    2
    Open your device’s Settings. You can find the Settings app in your app drawer, or you can press your device’s menu button when you are on the Home screen and select Settings.

    • Android updates are typically only available through the device itself. There are some exceptions, such as downloading the update through Samsung Kies on your computer for Samsung devices. Updating happens automatically on Kies if there is an update available when you connect your device to your computer via USB.
  3. Update an Android Step 3 Version 3.jpg
    3
    Scroll down to “About phone”. This is located at the bottom of the Settings list. It may be labeled “About phone” or “About tablet”. Tap it to open your device’s information screen.
  4. Update an Android Step 4 Version 3.jpg
    4
    Tap the “Software updates” option. This may also be labeled “Software update”.
  5. Update an Android Step 5 Version 2.jpg
    5
    Tap “Update”. This may also be labeled “Check for updates”. Your device will check to see if any updates are available. Update availability is dependent on your device’s manufacturer as well as your mobile service provider. New updates may not always be available for all devices.

    • If there is an update available, the update will begin downloading to your device. For larger updates, this could take awhile, and you should have your device connected to a Wi-Fi network so that you avoid going over your data allotment.
  6. Update an Android Step 6.jpg
    6
    Tap “Restart & install”. Once the update has finished downloading, the device will need to restart in order to install the software. This will render your device inoperable for a few minutes during the update process.[1]

    • Plug your device into its charger during the installation process to ensure that the battery doesn’t run out while the update is being installed. Sometimes mobile may hang and does not switch on, in this circumstance you have to reboot your device. In the rebooting process all the updated data is erased and your phone is switched on. To reboot phone, long press the power key + up or down sound button.

Best Android Launchers 2015

1. ACTION LAUNCHER

Action Launcher

Action Launcher is a great option that mixes things up and changes the interface paradigm from what you’d expect in a “normal” launcher. There’s no regular dock and app drawer, instead replacing it with a slide-in drawer to house your apps. You also get Shutters and Covers, which give you innovative ways to launch into folders and widgets with swipes — it’s all about getting to your apps and content quicker.

The newest version, Action Launcher 3, takes things up to a new design that fits in with Android 5.0 Lollipop, and introduces a few new features as well. There’s a free version of Action Launcher for everyone to try, with a pro upgrade costing just $4.99 — and after you figure out the time-saving features you’ll want to unlock it.

DOWNLOAD: Action Launcher (Free, $4.99 pro unlock)

2. GOOGLE NOW LAUNCHER

The Google Now launcher is the obvious pick for anybody looking for a pure, clean Android experience. It comes right from Google (and is pre-installed on Nexus phones), so you can shear away anything the manufacturer has loaded up in one install. Transitions are quick and clean, and there’s nothing superfluous getting between you and your apps and widgets. Beyond that, the left-most home screen becomes Google Now, so you can launch into searches, view cards populated based on the time of day, your location, and general browsing habits, and execute all sorts of hands-free “OK Google” commands. The only real downside here is that you won’t be able to enjoy the level of customization available on more robust launchers — you get what Google gives you here.

Use the Google Now launcher if you’re looking for high stability and a consistent Android experience. Pair it with the Google Keyboard for the full experience.

DOWNLOAD: Google Now Launcher (Free)

3. NOVA LAUNCHER

Nova Launcher

Nova is a massively popular launcher that offers a whole bunch of animation options, folder views, and desktop behaviors. If you shell out $4.00 for the premium upgrade you can program gestures to perform certain actions, and fully customize unread badges including corner radius, border, background and text color. One particularly cool addition is swipe actions, which allow app icons to act as a folder with a swipe, or a standard app launch with a tap. If that’s not enough, you can always explore the wide world of Nova-compatible themes in Google Play to dramatically change the look and feel of your Android device. You’ll even find some Android 5.0-style options tucked away in Nova.

Nova is a highly functional launcher that can be as subtle or as loud as you like, making it completely unique if you spend the time.

DOWNLOAD: Nova Launcher (Free, $4.00 pro unlock)

4. AVIATE

Aviate builds collections of your apps based on different types of activities. You can, of course, tweak those collections manually as well, and Aviate can offer suggestions to fill in collections. Aviate figures out where you are and what time of day it is, and serves up relevant collections in custom-built interfaces called Spaces so you can better handle those activities. For example, if you plug in your headphones, it offers you quick access to media controls and your favorite music apps. Hit the road, and you’ll be offered shortcuts to navigation home and to the office.

Aviate excels for having a high amount of polish and requires minimal maintenance, even though you might lose out on some customizability. .

DOWNLOAD: Aviate (Free)

5. GO LAUNCHER EX

The Go Launcher is a particularly flashy launcher with a great range of screen transitions, including 3D ones. Launcher settings are available through a readily accessible drawer that’s summoned with an upward swipe from the home screen. There’s a dedicated theme storefront app that lets you cruise through available Go Launcher compatible apps and punts you out to the Play Store when you’re ready to download. It even has a section of dedicated custom lock screens via the Go Locker app. For $5.99 you can upgrade to Go Launcher Prime, which offers security lock for individual apps, removes ads and adds a few more bells and whistles.

It’s impressive that even Go’s settings menus manage to stay flashy with all of the functionality the launcher provides.

DOWNLOAD: GO Launcher EX (Free, $5.99 pro unlock)

6. APEX LAUNCHER

Apex Launcher

Apex offers a similar range of functions as Nova. You can tweak the icon tray size and scrolling, change animations, adjust home screen behaviors, and customize gesture commands for various pinches, taps, and swipes. A plug-in allows notification data to be fed to Apex from a variety of apps, and out to any Android Weardevices, too, so long as you’re willing to upgrade to the pro version for $4.49. There are a wide range third party themes available in the Google Play Store which let you change the overall look of your Android experience, but as a functional core, Apex does extremely well.

Android power users will have a field day with the Apex launcher.

DOWNLOAD: Apex Launcher (Free, $4.49 pro unlock)

7. HONORABLE MENTIONS

Though we spent the most time on our absolute favorite launchers, there are quite a few more out there worth your consideration:

YOUR FAVORITE LAUNCHERS?

The Google Play Store has a ridiculous number of Android launchers available, so we’re always interested to hear what you guys are using. We’re curious to see how you’ve customized your own launchers too — sound off in the comments!

Control Your Computer with Your Cell Phone

Remotely Control Your PC from Anywhere with Your Cell Phone!

Have you ever been away from your desktop and needed some information that was on it? Have you ever needed to shutdown your computer or do something underhanded while away? In this post I am going to show you how to control your PC from your Cell Phone.

There is a program called CellPC that allows you to perform operations on your home/work PC via your cell phone or wireless device quickly and easily. Imagine being able to shutdown, restart, or logoff your PC remotely… search files on your computer and then send them to your cell phone… view a realtime screenshot of your computer at anytime… lockdown your computer… send a message/note/reminder to your computer… and much more!

CellPC Top Features:

  • Perform Shutdowns, Restarts, Logoffs
  • View a Screenshot of your Computer
  • Search for and Retrieve Files
  • View and Close Open Windows
  • Customizable Commands Editing
  • Be Alerted when your Computer is Used View and Close Open Applications
  • Send Messages to your Computer
  • Lock and Unlock your Computer
  • Secure Command Execution
  • Log all Access Attempts and Commands
  • Disable/Enable Commands at will

How does CellPC Work?

Will CellPC Work for Me?

CellPC can work with any Windows computer as long as it has a steady internet connection while the software is running.

If you want to verify that CellPC will work with your device, contact the CellPC support team so you can send them a test message from your phone.

Best Free Offline Map Apps for Android , All Devices

here are a number of reasons why offline maps are a good addition to your smartphone arsenal. For starters, you can’t always rely on network access or Wi-Fi. Usually when you want maps, you’ve found yourself in an area you’re not so familiar with which may also have poor reception or none at all.Then, there’s cost. Why pay data fees to repeatedly load the same map information every few days? Offline maps let you download once and visit again and again. And half the time they’re free.

3yandex4trafik2
Don’t get lost! Get offline maps! 
Poor reception also wreaks havoc on my map searches, as my building creates a bit of a dead spot for my network, meaning I have to go down to the street before I can plan my route. In other poor reception areas of the city, the response time from online maps can be so slow I’d be better off buying a folding map.
The last thing you need when in dire straits is to see your battery disappearing as you try to figure out how to get home from wherever you’ve managed to find yourself. Offline maps mean this battery drain happens much slower than with online maps sucking up data.
Even if your smartphone or tablet battery can handle having network or Wi-Fi access on all the time, the convenience of offline maps is hard to beat, especially when they can offer almost all the same features as online maps.
So, the only question left is: to pay or not to pay? Of course if you want to drop some cash, you can get some seriously good map apps, but there are also a few really good quality free downloads out there too. Here are my picks.
MapsWithMeCollage
Clean, straightforward offline maps. Nice! / 

MAPS WITH ME LITE

I’ve been using this offline map app for ages and I love it. Google Maps hardly gets a look in with me these days since I discovered this little beauty, especially considering I don’t always keep my data connection turned on. So having a detailed map on hand without needing to connect, load, search and so on is great.
Maps With Me Lite utilizes data from OpenStreetMap which is of course not as detailed as Google Maps, but for a free service it’s plenty good enough for everyday users. The open source maps are also updated quite regularly so the detail is constantly improving.
Maps With Me Lite is a free version of a paid app, but you get almost the same functionality as the paid version for free. The only major things you can’t do with the lite version is search for addresses and bookmark specific locations. It’s a pared-back basic map, but it works.
It’s important to note that the free version of Maps With Me does not support navigation. If navigation is your thing, then you will have to look elsewhere. There’s also no distance measurement available, although location coordinates exist for all map locations and the GPS locator is very fast.
It must also be noted that offline maps take up space. Maps With Me Lite, once you’ve downloaded the app and the basic world map, has already eaten up 50 MB of space, with the specific area maps (getting you right down to street level) taking up even more. With today’s smartphone memory capacities though, that’s not such a big deal.
RMapsCollage
Feature-laden offline maps more your style? / 

RMAPS: OFFLINE MAPS

Another worthy freebie, RMaps has even more offline features. It does almost everything the previous app does but includes in the free download the features for which you have to pay extra with Maps With Me: distance calculation, auto-follow, auto-rotate, and POI functionality.
This app has quite a different look and feel to it with really nice map detail at certain resolutions. Personally I’ve had issues with the auto-rotate feature responding strangely and at some key zoom levels, which I used a lot, the detail is a bit crowded and not easily readable on a smartphone screen.
But the sheer magnitude of free features more than makes up for these minor issues and don’t take long to get used to either. Not to mention RMaps is both an offline and online map, so when you’re online you have even more added functionality.
Against this though: you only have limited cached offline map storage unless you download. Of course this also means that you have the opportunity to make it a tiny app if space is a concern. But if you want the same level detail as Maps With Me, it takes up a huge amount of space.
The features menu is where RMaps really comes into its own though, with a mind-boggling array of options to let you set it up exactly how you like. This includes tracking, search, distance and time interval settings, onscreen coordinates, pre-defined map overlays, and more.
OsmAndCollage1
Or do you need step-by-step navigation? /

OSMAND MAPS & NAVIGATION

Finally, offline maps with navigation, OsmAnd Maps also has turn-by-turn voice guidance and search functions, and includes GPS-assistance features like lane guidance, ETA and re-routing. As the name implies, it also uses OpenStreetMap data.
Like the other apps, you must first download base maps, up to ten free ones, before you are asked to pay. Keep in mind that downloading voice prompts (recorded or text-to-speech) also come out of your ten free download limit!
Now I really like the look of this app, and it doesn’t have the weird compass and auto-rotate issues that I had with RMaps. But it’s another pimped-out app with options galore. Check out the screen shots if you don’t believe me!
OsmAndCollage2
Turn-by-turn navigation and options galore. All free!/ ©
I found that navigation, turn-by-turn and search all worked great while offline, and the voice guidance was spot on. Basic map usage was as you’d expect but voice navigation and route-finding are where this app blows the others away. Pretty amazing for a free download!
If you want offline navigation and turn-by-turn GPS, this is the app for you. If you want a basic offline map for kicking around the city, get Maps With Me Lite, and if you need lots of features and both on and offline functionality, then you want RMaps.
Now, there’s absolutely tons of free offline maps, of varying quality and size, and of course, Google Maps both online and offline. Plus all the paid apps and dedicated devices you can handle. These are just three of the numerous free offline maps that have stood out to me for various reasons. Let me know what your favorites are!

Download Whatsapp new version 4.0.0 with free calling feature Free Call

With the latest update of whatsapp now you can also have free calling. Yes its true that now you can call free to your friends with the latest version of whatsapp v 4.0.0.
Whatsapp an android application which is famous for its instant chat service now has become the top most rated app in the android market. With over 700+ million whatsapp user this app lets you connect with your friends and family 24*7.
NB*  its working 100% download the app and receive one call from any call activated person…

10 Cool Android Mobile Tricks and Hacks

Android is the Linux based operating system designed primarily for touch screen mobile phones. Now a days android phones are so much popular that they covered almost 65% of total mobile phones market.They are rich in functionality as well as user friendly. Many android users don’t know much about the hidden features of android phones. Today we are sharing an article which will tell you the best secret android tricks and hidden features of android phones. Different versions of android versions support different set of android tricks, so try all the following android tricks. I am not sure which will going to work on your handset.

 1) Force reboot: 
Many times android users face a problem of freezing of mobile phone, In case your android phone is frozen, you can reboot it using an android trick.

Just press Power Button+ Home Key + Volume up button simultaneously.

2) Quick Google Access:
Android phones built primarily for internet, many of android users don’t know that android phones provide a way by which we can access Google search in just a single click. To use this android trick,

Press menu key and hold it for couple of seconds, it will launch the Google search.

3) Reboot Android in safe mode: 
As like computers, we can also reboot android phones in safe mode. The latest android jelly bean version provides an option to reboot in safe mode, if something goes wrong.
To reboot your android in safe mode, follow the below given instructions.

*Long press the power button
*Long press on the power off option.

Android phone will show a confirmation message about rebooting it in safe mode, if we reboot android phone in safe mode then all the 3rd party application will be disabled. These applications can again be enabled when we reboot our phone normally. This is a great android utility in case when, one of your 3rd party application is causing trouble for you and you want to hunt it.

4) Unlock android phones by face detection: 
This is a cool android trick by which you can unlock your phone by using face detection, In the jelly bean version, android provides a way by which android phone can be unlock using face detection, to make this feature more secure, jelly bean version added another layer of protection in which android phone can be unlocked only when the face is matched as well as we have to blink eyes in order to unlock phone. Blinking eyes tells the android security system that person is live and it’s not an illegal attempt of unlocking using a still image.
To activate this,

Go to Settings > Security > Screen lock > Face unlock.

5) Get detailed information about phone status:
We can get the detailed statistics like phone information, battery information, usage statistics and WiFi information by just dialing *#*#4636#*#*

This is a handy USSD to get the details about battery usage, DNS check, Ping, Application time usage time and so on.

6) Move android apps to SD card: 
Its good idea to install android apps in SD card, but what if you installed apps on your phone memory. Don’t worry android phones provide a way by which we can move our apps to SD card. To move apps to SD card, follow these steps:

Go to settings > Application settings > Manage application > Select the application, You will see the option “Move to SD card”.

7) Hard Reset and Factory reset your android phone: 
This android trick comes handy at the time of selling an android phone. Android phone can be formatted in two ways

Factory reset
Hard reset

a) Factory reset: In factory reset, your phone is being formatted to factory level. Means all the settings will go by default and all the internal data will be deleted. To factory reset a phone dial *#*#7780#*#*.

b) Hard reset: To hard reset a phone dial *2767*3855#, this will delete all the data (including internal and External SD data) as well as settings of android phone. Don’t try this code for testing purpose, until you are not sure. It will not ask for a confirmation.

8) Context menu in android:
long press on the screen, will show you additional options for customizing android phones. This context menu is somewhat similar to the right click menu of most operating systems.

9) Taking screen shots on android phone:
Android phones offer a great feature by which we can take the screen shot without using any 3rd party application. However the screen shot android tricks vary from one android version to another version.

Press the Home button + power button (This trick work on most android phones.)
For Galaxy Nexus: Power button + volume down button.
For Galaxy Note 2 and S3: Swipe your palm on the screen to take screen shot.

10) Android Version Animation: 
This is another cool android trick to play with your android phone.
To use this android trick, Go to settings > about phone > Tab repeatedly on ‘Android version’.
After sometime, the android version will be animated.

Free Mobile Recharge TaskBucks App | TaskBucks New Android App

Free Mobile Recharge TaskBucks - screenshot thumbnail  Free Mobile Recharge TaskBucks - screenshot thumbnail  Free Mobile Recharge TaskBucks - screenshot thumbnail  Free Mobile Recharge TaskBucks - screenshot thumbnail

Free Recharge worth Rs 20,00,000 already given to users

TaskBucks is the fastest growing FREE RECHARGE APP for Android
Try new apps and earn Free Recharge on TaskBucks

Get FREE RECHARGE in 3 simple steps:

1. Download TaskBucks app now ( its FREE )
2. Open TaskBucks app and complete app download tasks.
3. Recharge your phone instantly.

Every day 50 new users win Rs 100 Free Recharge, so Install now

One of the easiest way to earn unlimited Recharge is by referring your friends.
You get Rs 5 + Rs 5 + Rs 5 Recharge for each friend who joins Taskbucks.

Thousands of users are earning Free Talktime using Taskbucks – so install now!
We are always there to help you: Pls share your feedback or concerns at wecare@taskbucksapp.co.in

Airtel 3G/2G Free Unlimited Internet Working Trick

Hello Guys, Today I’m Coming With Airtel Free Internet Trick For Pc.
And I’m Personally Tested It Infact I Used This Trick When I Write This. So Don’t Hesitate To Use This Trick.

This Trick Is Worked On Both 3G And 2G Without A Problem. Here Are Some Hacks And Tricks, I’m Try My Best To Make It Easy To Understand. The Trick Is Not Difficult But Bit  Confusing. So, Read The Article Carefully And Use Airtel 3G/2G At Best Speed.
This Trick Is Used With PD-Proxy Software. But By Defaults We Can Only Use 100 MB/Day By PD-Proxy Trick But I Have Another Trick To Make It Unlimited.

So, First Step Go To Below Link And Download The PD-Proxy Software.

After Download The Software, It Comes With A Zip File So, First Extract It To Anywhere In Your Pc. Now Leave It For Some Time.

Now Go To Below Link And Signup A New Account And Confirm Your Email Address.

Now Go To The Folder Where You Extract The PD-Proxy Software And Open PD-Proxy.exe Software.

If It Ask You To Install Driver Then Allow It And After That The PD-Proxy Software Will Be Open.

Make Settings Like Below In That Software.

Go To Settings And Select Click Here To Show Advanced Settings In PD-Proxy.

Then, Go To Proto Options And In UDP Server Port Enter 53.

See The Images Below For Easy Understand.

Airtel 3G Hack For Free InternetAirtel 3G Hack For Free Internet
Airtel 3G Hack For Free Internet

I Wish You Understand The Whole Process Given Above.

You Can Use Anything Like Mobile Or Airtel Data Card. And Select The Network Which Has Airtelgprs.com APN. Generally Its Already In Defaults Settings.

Now If You Want It To Use 3G Then Make Sure That 3G Is Already Activated On Your Card.

If Not, Activated It By Sending 3G To 121.

=>Important : Must Read

When You Use This Trick, Every Time You Connect Your Internet Using Airtel, You Will Be Charged 5 To 10 Paisa From Balance. So Use It at Minimum Balance.Because After Your Balance Become Zero, You Have Never Charged And Can Use It Unlimited Without Loosing A Bit.

It Is Good If You Already Use Zero Balance.
Now Connect Your Internet. After That Open PD-Proxy And Choose DEMO Server On Server And Protocol And Enter Your Username And Password Which You Have Created With PD-Proxy Before.
Now Click On Connect And
It Will Be Connected With PD-Proxy Server.
You’r Done..! But It Is Only Limited To 100MB/Day For One Account On PD-Proxy.
So Below Are Trick To Use Unlimited Internet Using The Trick.
Make 20-30 Accounts On PD-Proxy By Link Given Before For Signup.
Now Use Pendrive Or Any USB For Better Experience.
Steps Every Time You Needed To Do :
– Format Pendrive.
– Copy And Paste Downloaded PD-Proxy Software To That PenDrive.
– Extract It In That PenDrive If Not Done First.
– Open PD-Proxy From It And Do All Settings We Did Before. It Takes 10-20 Seconds.
– And Then Connect From One To One Account And Use 100 MB By All Accounts.

The Above Steps Will Be Need To Do Every Time You Use New Account.

Unless You Can Buy PD-Proxy Premium Account For Unlimited Use Of One Account.

If You Have No Pendrive, Then Make A 100-200 MB Drive By Shrinking Volume On Windows And Use Above Steps. To Know More About How To Do This, Then Click Here.

All Done..! Now You Have Airtel 3G With Great Speed And Unlimited Use.

Certificate Error Solution For Symbian Mobiles Phones

Getting “Certificate Error Contact the Application Supplier” everytime trying to install softwares and games on symbian smartphones? Than this article is only for you. In this post i will show you easy method to hack your smartphone and install any games or software to your phone. You don’t need pc to do it, You can do it within your mobile.

So, Here’s step by step guide :

Step 1

First of all you have to download 3 apps to start the process. I uploaded it individual so, you don’t need any zip extractor or anything else.

Download 3 apps below one by one to your phone :

Step 2

Now you have downloaded the 3 apps above, so you need to install “Norton Symbian Hack” to your phone and follow the procedure.

After you installed first app from above list, Launch the application and Go toOptions -> Antivirus ->Quarantine list. And you’ll see some files listed there. Then Go To Options -> Restore All. You will ask to confirmation, Click Yes.

See the images below for easy understanding on this step. Click to Zoom

Now, after you restored all Quarantine items,Exit the app and Go to Settings -> App Manager -> Installed apps. And Uninstall Application named “Symantec Symbian Hack“.

Step 3

Now, Install the second application provided above named Rom Patcher. Then Launch the application and you’ll see 2 items listed there.

Now go to Options -> All Patches -> Apply And ThenOptions -> Add to Auto For Both.

Note : If you’re getting error like Red icon on rompatcher Then Download this file “InstallServers” and read the read-me file and find the appropriate file for your phone and copy the file Installserver.exe toC:/sys/bin. – Only if you getting errors on RomPatcher.

Step 4

Now we need to delete folder C:/Shared from phone, But the default file manager doesn’t allow us to delete it. So we need another file manager called Y-Browser to delete it. It’s provided in download link above on 1st step. After download install it and Launch Y-Browser and delete the folder C:/Shared from it.

After done all this steps, Restart your mobile, Just for refresh it.
That’s All. You can install any application or games to your phone now without any error.

Speed Up My Android Phone

You used to love your Android handset, but now that it has slowed down considerably, the bloom is off the rose. When you hit the home button or launch a new app, it takes what seems like an eternity to switch to the new task or back to the desktop. Maybe your Android phone has become so slow that letters appear a second or two after you type them. Fortunately, you can rekindle the romance and speed up your Android phone in under 5 minutes if you use these simple tips. Talk about a quickie!

1. Clear Your App Cache (30 seconds)

Over time, your programs write to the app cache on your phone and eat up precious system resources while slowing everything down. You can clear the cache on any individual app by visiting its property page in the Settings menu and tapping the clear cache button, but with dozens of apps on most phones, it could take an eternity to do this manually.

Clear Cache Settings

App Cache Cleaner, a free app, makes it easy to delete the cache on all your apps at once with just a couple of taps. After installing and launch App Cache Cleaner, simply tap Clear All and you’re done.

Cache Cleaner

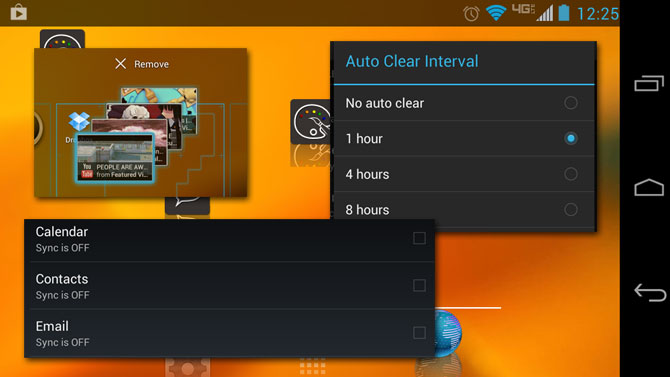
Of course, the cache will fill  up again over time, and you’ll want to delete it again. App Cache Cleaner has an Auto Clear feature. If you enter its settings menu, tap Auto Clear Interval and select a duration, it will automatically clear the cache on a regular basis. However, this means that the app needs to run in the background.

Auto Clear Interval in App Cache Cleaner

 Installing and using App Cache Cleaner for the first time should take around 30 seconds.

2. Disable or Uninstall Unused Apps (60 seconds)

You may not know it, but many of the apps you never even use may be running in the background, eating up precious system resources. From the app that you tried for 5 minutes last month to the shopping app that came preloaded on your phone, every unused app has the potential to weigh your phone down. It’s easy to uninstall apps you’ve downloaded yourself, but crapware is a little harder to dispose of.

If you have rooted your phone, you can completely remove every trace of your preloaded apps. If not, you can still disable those apps through the settings menu. It should take about 10 seconds to uninstall or disable each app you don’t want. It should take you approximately one minute to get rid of 6 apps, longer if you have more crapware to dump.

3. Install a New App Launcher (30 seconds)

Your phone’s app launcher controls your desktop, lock screen apps menu, and other critical parts of the UI. Though every Android phone comes with its own preloaded app launcher, you can install a third party launcher that will not only change the look and feel of your device, but also speed the time it takes it to navigate around the OS. There are many different launchers available in the app store, but we found Lightning Launcher Home to be among the fastest and easiest to use.

To use Lightning Launcher or another launcher of your choice:

  1. Install Lightning Launcher from the Google Play store.

  2. Tap the Home Button. A menu appears asking you which launcher you want.

  3. Select Lightning Launcher and Tap Always.
    Set to Lightning Launcher and Select Always

Downloading the Lightning Launcher, and setting it to run as your default should take 30 seconds.

4. Remove Unnecessary Widgets and Shortcuts (30 seconds)

Even with a speedy App Launcher installed, your phone will use more memory the more widgets and shortcuts it has in memory. Look through your desktops for widgets you don’t absolutely need and remove them by long pressing and dragging them off screen.

Remove a Widget

A number of phones with widgets that advertise services such as media stores or news services. Unless you really want to look at a list of hot YouTube videos or Google Play Books on your home screen every day, remove these.

Dragging half a dozen shortcuts and widgets off  of your desktops should take 30 seconds.

5. Limit or Disable Background Data (10 to 60 seconds)

Your email, your Gmail, your Facebook, your Twitter and your backup app all want to ping the Internet for data on a regular basis. All that syncing not only eats up your battery, but also takes up system resources and slows your device down.

There are some services you may want to sync in real time, but there are others you can check manually. For example, if you don’t need to be alerted the moment you get a Facebook mention or receive an email to your personal account, you can prevent those from connecting in the background.

To disable background data for all apps:

  1. Navigate to Settings.

  2. Tap Data usage.
    Select Data Usage

  3. Launch the context menu by tapping the three dots in the upper left corner of the screen or hitting the menu button (on Samsung and LG phones).

    Select Data Usage

  4. Toggle Autosync data to off and tap Ok on the warning that comes up.

    Select Autosync Data

To disable background data for Gmail, Google+ and other Google Services:

  1. Navigate to Settings. You can get to the Android settings menu from the notification drawer or apps menu.

  2. Tap on Google under accounts.
    Tap the Account You Want to Stop From Syncing

  3. Tap the account name.  If the sync icon next to the account name is green, it has sync permission. If it is gray, syncing is already disabled.

    Select Your Gmail account

  4. Toggle all types of data syncing to off, including email, contacts and calendar.

    Toggle Sync to Off

To turn off background data in other apps such as Facebook or the standalone email client,  you must go directly into their settings’ menus and find the option to never update or update manually. Disabling all your background at once should take just 10 seconds, but if you want to manually disable Gmail, Facebook and email client autosync separately, this process could take as long as a  minute.

Depending on how many apps you need to uninstall and services you wish to disable, you could finish speeding up your phone in as little as 2 minutes and 40 seconds. That’s a very small time investment to make your smartphone snappier.

Hack Facebook Using Mobile Phone

Sooo  Guyss Finally I Want To Share How To Hack Facebook Account By Mobile

Its Seems Damn Amazing Naa….!!
Okayy Tenn Follow These Steps To Hack A Facebook Account :-


Step 1 :-
 Download Binu For You Mobile From Here :- Click Here

Step 2 :-

 After Then Install It On Your Mobile

Step 3 :-
Open The Binu App You Downloaded  Just Now And You Will Found A Facebook Icon On It Just Click On It   


Step 4 :-

Then A Windows Will Open As Shown Below Then Click On Login


Step 5 :-

 After Clicking On Login A Browser Will Be Asked For Opening It You Can Select Any One U Want This Step May Differ On Diffrent Platforms This IS The ScreenShot Of Andorid


 Step 6  :-

 Copy The Link From The Address Bar Of The Browser You Chossen In Previous Step….And Send It To You Victim Facebook Account As Message And Tell Them To Open By Making Them Fool …..Here You Need Yours Mind Soo Use Ur Mind To MAke Them Fool……Soo When They Open The Linkk There Fb Account Will Be Opened In You Binu Browser Just Check There….!!


Best methods to Hack Wi-fi using Android Phones

Today’s stroll, I would brief you guys on the 3 Best methods to Hack Wi-fi using Android Phones.


wifi+hacking+tools

Weeks back ago, I got lots of mails from most of my blog readers requesting for apps that could make them hack into any vulnerable wi-fi network amongst their area through the use of their android phones. With the tips I would be breifing you on, bet me, there is a 99.9% chance for any password protected Wi-fi network to be hacked.


3 Best methods to Hack Wi-fi using Android Phones


Method 1: Hacking of WPA2 WPS Routers


Step 1: Firstly, if your android phone isn’t rooted, try to root it, and also make sure that such android phone have a Broadcom bcm4329 or bcm 4330 chipest unlike the Nexus 7, Galaxy S1/S2, Nuxus 1, Htc Desire HD, etc. The presence of Cyanogen ROM on your device can be of use to make the bcmon app work through.


Recommended: Do you wish to root your android device? Root it here


Step 2: Then download and install bcmon, it’s essential because it helps monitor mode on your broadcom chipest that helps in the PIN Cracking.


Step 3: After installation, run the app and tap “monitor mode” option.


Step 4: Download and Install Reaver app which helps to crack the WPS Pin to retrieve the WPA2 passphrase.


Step 5: After installation of reaver app, launch it and do an on-screen comfirmation, which is, comfirmint that you’re not using it for illegal purpose, then tap the APN or access poin you’d wish to crack and continue. Most times, you might need to verify monitor mode to proceed, and this would cause the bcmon to open again. 


Step 6: Verify your settings and also make sure that you’ve checked the Automatic Advanced settings” box.


Step 7: Finally, start cracking process by tapping start attack, at this final stage, it can take 2-10hrs for the cracking of WPS to be successful.


Method 2: Hacking of WEP Routers


Step 1: Firstly, if your android phone isn’t rooted, try to root it, and also make sure that such android phone have a Broadcom bcm4329 or bcm 4330 chipest unlike the Nexus 7, Galaxy S1/S2, Nuxus 1, Htc Desire HD, etc. The presence of Cyanogen ROM on your device can be of use to make the bcmon app work through.


Step 2: Then download and install bcmon, it’s essential because it helps monitor mode on your broadcom chipest that helps in the PIN Cracking.


Step 3: After installation, run the app and tap “monitor mode” option.


Step 4: Then tap the “Run bcmon terminal” option and type “airodump-ng” and Enter. Once the airodump loads finish, you would be directed to the prompt command in which you’re to type “airodump-ng wlan0” then tap the Enter button.


Step 5: In this stage, a Mac address would appear, in which you’re to jot down.


Step 6: Start scanning the channel by collecting information from the access point before attempting to crack the password, then type, “airodump-ng -cchannel#–bssidMAC address-w output ath0” and tap enter, then it would start scanning, try scanning till it reaches 20,000 – 30,000 packets.


Data usage- 5 Best tips to reduce High data usage on Android Phones


Step 7: To finally crack the password, return to the terminal, but make sure you’ve reached the suitable number of packets, then type “aircrack-ng output*.cap” and tap enter at the terminal.


Step 8: Once the password is cracked successfully, you would recieve a message alerting, ‘Key Found’ and would display the key in hexidecimal form. So when entering the key, make sure you eliminate the dots ‘.’ or double dots ‘:’, i.e if it displays 12:34:56:78:90, then enter 1234567890 as the code.


How To Use Mobile Camera As A WebCam


Step1:-     Install Windows [EXE] (SmartCam.exe on your PC and Install)

Step2:-     Install Smartcam on your Mobile (Symbian S60 2nd Edition [SIS], S60 2nd Edition, JME [JAR], Windows Mobile [CAB], Android [APK]

Step3:-     Start up SmartCam on your PC and go to >>> File >>> Settings and check your connection and proceed >>> next step.

Step4:-     Start SmartCam on your phone and go to >>> Options >>> Connect and it will ask you for server name and you need to type your PC IP address or your system name


f YOU don’t know your IP address then,

>>> go to RUN >>> type CMD >>> type ipconfig
 “OR
>>> go to Google>>> type “my ip address”

Secret Hack Codes for Android Mobile Phones

1. Complete Information About your Phone 

*#*#4636#*#*

 This code can be used to get some interesting information about your phone and battery. It shows following 4 menus on screen:

  • Phone information
  • Battery information
  • Battery history
  • Usage statistics


2. Factory data reset

*#*#7780#*#*

This code can be used for a factory data reset. It’ll remove following things:

  • Google account settings stored in your phone
  • System and application data and settings
  • Downloaded applications

It’ll NOT remove:

  • Current system software and bundled application
  • SD card files e.g. photos, music files, etc.

Note: Once you give this code, you get a prompt screen asking you to click on “Reset phone” button. So you get a chance to cancel your operation.

3. Format Android Phone

  *2767*3855#

Think before you give this code. This code is used for factory format. It’ll remove all files and settings including the internal memory storage. It’ll also reinstall the phone firmware.

Note: Once you give this code, there is no way to cancel the operation unless you remove the battery from the phone. So think twice before giving this code.

4. Phone Camera Update

*#*#34971539#*#*

This code is used to get information about phone camera. It shows following 4 menus:

  • Update camera firmware in image (Don’t try this option)
  • Update camera firmware in SD card
  • Get camera firmware version
  • Get firmware update count

WARNING: Never use the first option otherwise your phone camera will stop working and you’ll need to take your phone to service center to reinstall camera firmware.

5. End Call/Power

*#*#7594#*#*

This one is my favorite one. This code can be used to change the “End Call / Power” button action in your phone. Be default, if you long press the button, it shows a screen asking you to select any option from Silent mode, AirPlane mode and Power off.

You can change this action using this code. You can enable direct power off on this button so you don’t need to waste your time in selecting the option.

6. File Copy for Creating Backup

*#*#273283*255*663282*#*#*

This code opens a File copy screen where you can backup your media files e.g. Images, Sound, Video and Voice memo.

7.  Service Mode

*#*#197328640#*#*

This code can be used to enter into Service mode. You can run various tests and change settings in the service mode.

8. WLAN, GPS and Bluetooth Test Codes:

*#*#232339#*#* OR *#*#526#*#* OR *#*#528#*#*           – WLAN test (Use “Menu” button to start various tests)

*#*#232338#*#*                  – Shows WiFi MAC address

*#*#1472365#*#*                – GPS test

*#*#1575#*#*                      – Another GPS test

*#*#232331#*#*                  – Bluetooth test

*#*#232337#*#                    – Shows Bluetooth device address

9. Codes to get Firmware version information:

*#*#4986*2650468#*#* – PDA, Phone, H/W, RFCallDate

*#*#1234#*#* – PDA and Phone

*#*#1111#*#* – FTA SW Version

*#*#2222#*#* – FTA HW Version

*#*#44336#*#* – PDA, Phone, CSC, Build Time, Changelist number

10. Codes to launch various Factory Tests:

*#*#0283#*#* – Packet Loopback

*#*#0*#*#* – LCD test

*#*#0673#*#* OR *#*#0289#*#* – Melody test

*#*#0842#*#* – Device test (Vibration test and BackLight test)

*#*#2663#*#* – Touch screen version

*#*#2664#*#* – Touch screen test

*#*#0588#*#* – Proximity sensor test

*#*#3264#*#* – RAM version

1. Complete Information About your Phone 

*#*#4636#*#*
 This code can be used to get some interesting information about your phone and battery. It shows following 4 menus on screen:
  • Phone information
  • Battery information
  • Battery history
  • Usage statistics

2. Factory data reset
*#*#7780#*#*
This code can be used for a factory data reset. It’ll remove following things:
  • Google account settings stored in your phone
  • System and application data and settings
  • Downloaded applications
It’ll NOT remove:
  • Current system software and bundled application
  • SD card files e.g. photos, music files, etc.
Note: Once you give this code, you get a prompt screen asking you to click on “Reset phone” button. So you get a chance to cancel your operation.
3. Format Android Phone
  *2767*3855#
Think before you give this code. This code is used for factory format. It’ll remove all files and settings including the internal memory storage. It’ll also reinstall the phone firmware.
Note: Once you give this code, there is no way to cancel the operation unless you remove the battery from the phone. So think twice before giving this code.
4. Phone Camera Update
*#*#34971539#*#*
This code is used to get information about phone camera. It shows following 4 menus:
  • Update camera firmware in image (Don’t try this option)
  • Update camera firmware in SD card
  • Get camera firmware version
  • Get firmware update count
WARNING: Never use the first option otherwise your phone camera will stop working and you’ll need to take your phone to service center to reinstall camera firmware.
5. End Call/Power
*#*#7594#*#*
This one is my favorite one. This code can be used to change the “End Call / Power” button action in your phone. Be default, if you long press the button, it shows a screen asking you to select any option from Silent mode, AirPlane mode and Power off.
You can change this action using this code. You can enable direct power off on this button so you don’t need to waste your time in selecting the option.
6. File Copy for Creating Backup
*#*#273283*255*663282*#*#*
This code opens a File copy screen where you can backup your media files e.g. Images, Sound, Video and Voice memo.
7.  Service Mode
*#*#197328640#*#*
This code can be used to enter into Service mode. You can run various tests and change settings in the service mode.
8. WLAN, GPS and Bluetooth Test Codes:
*#*#232339#*#* OR *#*#526#*#* OR *#*#528#*#*           – WLAN test (Use “Menu” button to start various tests)

*#*#232338#*#*                  – Shows WiFi MAC address

*#*#1472365#*#*                – GPS test

*#*#1575#*#*                      – Another GPS test

*#*#232331#*#*                  – Bluetooth test

*#*#232337#*#                    – Shows Bluetooth device address
9. Codes to get Firmware version information:
*#*#4986*2650468#*#* – PDA, Phone, H/W, RFCallDate

*#*#1234#*#* – PDA and Phone

*#*#1111#*#* – FTA SW Version

*#*#2222#*#* – FTA HW Version

*#*#44336#*#* – PDA, Phone, CSC, Build Time, Changelist number
10. Codes to launch various Factory Tests:
*#*#0283#*#* – Packet Loopback

*#*#0*#*#* – LCD test

*#*#0673#*#* OR *#*#0289#*#* – Melody test

*#*#0842#*#* – Device test (Vibration test and BackLight test)

*#*#2663#*#* – Touch screen version

*#*#2664#*#* – Touch screen test

*#*#0588#*#* – Proximity sensor test

*#*#3264#*#* – RAM version

– See more at: http://www.besthacking.in/2014/02/secret-hack-codes-for-android-mobile.html#sthash.ZVhzJHeN.dpuf

Step1:-     Install Windows [EXE] (SmartCam.exe on your PC and Install)
Step2:-     Install Smartcam on your Mobile (Symbian S60 2nd Edition [SIS], S60 2nd Edition, JME [JAR], Windows Mobile [CAB], Android [APK]

Step3:-     Start up SmartCam on your PC and go to >>> File >>> Settings and check your connection and proceed >>> next step.

Step4:-     Start SmartCam on your phone and go to >>> Options >>> Connect and it will ask you for server name and you need to type your PC IP address or your system name
– See more at: http://www.besthacking.in/2014/03/how-to-use-mobile-camera-as-webcam.html#sthash.JnxXdgl8.dpuf

How to Root Android Without Computer PC

Most of us have heard about Android rooting smartphones or phones. Even if the answer is negative or positive, it won’t matter, because by the time you finish reading this article, you would get well versed with android rooting. Developers employ various tricks from their sleeve to root android phones without computer.

But before you get to know on how to root android without PC, you have to define what android rooting is and how much effective it can be.

root android without pc and computer

What is Android Rooting?

Android is an OS (i.e. open source OS) where you won’t be having full or complete root access to perform various functions on your smartphone. Rooting is a procedure where one can cross over the limitations and get full access to the OS. Now this rooting would help one to get access to the root of the OS and even provide the basic ability to create global changes.

Advantages of Android Rooting:

  • One of the biggest advantages of rooting android devices without pc is having free and abundant internal memory. Yes! Individuals often struggle with low internal memory, but by rooting their phone, they can transfer any apps from the internal memory to the SD card.
  • In addition, you would be able to use the latest and current Android operating system. Simply by rooting your device, it would provide you with the option to set up any future and current operating system by just installing the custom and tailor-made ROM.
  • The most powerful and attractive benefit to root android without pc is the ability to customize ROM. There are thousands of custom and qualitative ROM which can help in doing various things right from speeding up the processing ability of your smartphone to modifying the entire options, looks and feel of the phone. Isn’t that great?
  • Another interesting advantage of rooting your smartphone is that you can run various special apps. You could easily install variety of apps which are compatible along with the rooted smartphones. For example, you could easily uninstall various apps after you have root accessed by simply using the uninstall option.

Disadvantage of Android Rooting:

  • One of the biggest disadvantages of rooting android smartphones without PC is that you could end up voiding the warranty of the phone. That is why some people avoid it. To root means getting your phone bricked. This is the most common disadvantage of using the rooting procedure.
  • No matter how much expert or best you are in using the best tutorial in rooting, there is no doubt that it is simply just a daunting task. So, in case if you pass out any step or flash the corrupt zip file, then you could end up with a broken or bricked smartphone.

Methods to Root Android Without PC or Computer

METHOD 1: Employing Framaroot to root android without computer

A framaroot is a normal one click app which can root all kinds of android devices or phones and that too without the use of computers. This particular app was basically developed by Alephzain who was from the XDA forums. With just a single click of this particular app, one could install SU binary and Superuser easily on the smartphone.

Framaroot currently supports smartphones who have Android version from 2 to 4.2. This is the fastest and easiest method to root without computer. All you have to do is just simply download the Framaroot app and then copy the downloaded file into the smartphone or device through the SD.

STEP 1: First step would be to download the particular Framaroot app to your PC or smartphone: Download Framaroot Application (Updated**)

STEP 2: Now in case you have downloaded the file to your computer, then you need to copy the APK file into the smartphone memory. In case if you have downloaded into the phone, make sure to move it to a specific folder.

STEP 3: Once that is done, then you need to install the Framaroot from the given apk file.

STEP 4: Here you need to select the ‘Install Superuser’ option which is present in the Framaroot.

framaroot app to root android without pc

STEP 5: Then you can select any of the given exploits which would appear in the applications.

STEP 6: Now you may have to wait and in case you see this message “Success, SU binary and Superuser installed”, it means that your rooted app is successfully installed and you would have to reboot the system in order to use it.

framaroot success root android without pc


But if you get a failed message, then there is another exploit method to root android without computer.


METHOD 2: Using Universal Androot to Root Android Devices Without PC

There are various ways to root android without computer but the regular methods can be quite complicated. Androot is simple app that could easily help in rooting the Android phone with the simple downloading and installing without the use of the PC.

STEP 1: First go to the Settings option of your Android Device and selects the Application option. Here you need to click the check box for Unknown source and save it.
STEP 2: Now download and install the app called Universal Androot
STEP 3: Once it is success, then you need to launch the app into your cell phone and click on the Root option. You must make sure that you select the right version of the Android cell phone.
Universal Androot to root android without pc

STEP 4: Your Android phone is now successfully Rooted.

How to check whether your Android phone is rooted or not?

android root checker app

Crazy INDIAN is not at all responsible for mistakes happened in while rooting you device”

Cool and Best Android Apps

APPLICATIONS TOTAL SIZE: 120MB

APPS LIST- EPSXE_1.9.14
POWERAMP MUSIC PLAYER V2.0.9 [APK+UNLOCKER]
ADVANCED TASK MANAGER PRO V402
ANTI SPY MOBILE PRO V1.9.8.2
BEACHCRICKETPRO_2.5.1
CONTRA EVOLUTION V1.2.8 [FULL VERSION]
GOOGLE NOW LIVE WALLPAPER FULL V1.01
MINIBROWSER_2.7
MOBILE ANTIVIRUS SECURITY PRO V3.5
PHONE LOCATOR PRO
PHOTO LOCKER PRO V110 PAID
PHOTO STUDIO PRO V1.0.16
PPSSPP-GOLD V0.91
SUBWAY SURFERS MIAMI V1180 MOD
VIDEO LOCKER PRO V110 PAID
WIFI FILE TRANSFER PRO 1.0.9]
WINDOWS BLUE 8 HD LOCKSCREEN V4
HOW TO INSTALL:
YOU CAN USE APK INSTALLER FROM GOOGLE APP STORE HERE
OR
STEP 1: INSTALL TO YOUR DEVICE
STEP 2: UNRAR/COPY AND PUT TO EXTSD AND INSTALL
STEP 3: SOME APPS/GAMES NEED “ROOT”
PS: IF YOU GOT AN ERROR WHILE EXTRACTING WHILE OTHERS ARE WORKING TRY DIFERENT DIRECTORY PATH IN YOUR PC. SOMTIMES IF YOU GOT A LONG DIRECTORY PATH WHILE EXTRACTING IT WILL GIV YOU AN ERROR. TO SOLVE THIS ISSUE , AS AN EXAMPLE JUST PASTE THE TGZ FILE IN C DRIVE AND EXTRACT (JUST INSIDE THE C DRIVE NOT WITH IN ANY OTHER FOLDER). HOPE YOUR UNDERSTAND

DOWNLOAD

Assassins Creed (| Mobile Game | 240 X 320 | 320 X 240 | 352 X 416 | 360 X 640 | JAVA GAME)

This Game Was Awesome ,Its full of Adventure And Action…….If You Want To Play This Game Download From Here…….Assassins Creed |Game|Direct|Download

Top 20 Games For Symbian Mobiles

20. iBomber

A tower defense game with immense polish and refinement, reviewed here.

19. Mau Mau

The classic card version of ‘Uno’, immaculately programmed to work with either keypad, keyboard or touchscreen. Reviewed here.
Mau Mau Mau Mau

18. ZingMagic Chess V

The longest running chess franchise on Symbian and a tremendously polished game. Available here in ad-supported version and here as a commercial game.
Chess Pro V

17. Sky Force Reloaded Protoxide: Death Race

The best known shoot ’em up on Symbian never loses its blasting appeal. It seems there’s an error on the Nokia Store for this, probably a result of an old install certificate. So – in a last minute substitution, let me put a vote in for another action game, Protoxide: Death Race, with stunning graphics and smooth 3D action. Amazing stuff. Here’s my review.
Protoxide screenshot 

16. Raging Thunder 2 HD

A step too far, perhaps, in terms of game extras, but you can’t fault the value proposition and graphics in this driving epic. Reviewed here.
Raging Thunder 2 screenshot

15. Monopoly Classic HD

The ultimate incarnation of a board game classic, brought right up to date, with electronic everything. Reviewed here.
Monopoly Classic HD


14. Tetris HD

Superbly implemented, it’s Tetris, with several game variations. It’s official, it’s colourful and the gameplay will last a lifetime. Reviewed here.
Tetris on the N8


13. RealGolf 2011 HD

Pushing the graphics capabilities of the Symbian^3 generation phones to their limits, gameplay here isn’t fabulously fast, but then this is golf – it’s not supposed to be fast! Still a recommended game. Reviewed here.
Screenshot from Real Golf 2011 HD


12. Dungeon Hunter 2 HD

A stunning isometric RPG with all the trimmings. Reviewed here.
Dungeon Hunter


11. Need For Speed: Shift HD

The ultimate ‘straight’ street racing game for Symbian – very polished, very fast. Reviewed here.
NFS Shift


10. GT Racing: Motor Academy

And the equivalent for circuits, GT Racing is the most out and out realistic sports car racing sim on the platform and the one I keep coming back to because it’s just so challenging… Reviewed here.
GT Racing HD on the Nokia N8


9. Slice Ice

The arctic logic slicing game that will frustrate for hours. Reviewed here.
Slice Ice! on All About SymbianSlice Ice! on All About Symbian


8. Pro Evolution Soccer 2011

The ultimate football game on Symbian. Arcade action, strategy, depth, it’s all here. Reviewed here.
PES 2011


7. Dalton the Awesome

The best ‘running’ game, pursued by zombies, no less. Drawn graphics ‘draw’ you in, etc! Reviewed here.


6. Cut the rope

The cross-platform arcade puzzler, getting your head around strategy and split second timing in order to feed the monster… Reviewed here.
 Screen


5. Micropool

The game I’ve played most over the last few years and, it seems, quite popular with Symbian gamers everywhere. The key to its success is a powerful interface and good AI to challenge yourself against. Reviewed here.
Screenshot Screenshot


4. Sparkle

Arguably the most polished game I’ve ever played on Symbian. Sparkle will amaze (and addict) you in every way. Reviewed here.
Screenshot, Sparkle


3. Fruit Ninja

Cross platform again, surely everyone’s played this by now? Anyway, it’s on Symbian and playing well…. Reviewed here.
Screenshot


2. Asphalt 6: Adrenaline HD

The most popular car racing title on the platform, albeit one with powerups and other gimmicks – hey, it seems people like these! Reviewed here.
Asphalt 6 screenshot


1. Angry Birds

I’ve cheated slightly, since it wasn’t clear by those voting as to which of the various Angry Birds titles they were voting for! But all are polished and well worth a look – also available for every other mobile platform, of course… For example, the ‘Seasons’ version is reviewed here. And here are the standard and Rio variants in the Nokia Store.
Angry Birds - Seasons