AdBlock Plus – Stop Seeing Advertisments When You Use Internet

Surf the web without annoying ads!

  • Can block tracking, malware domains, banners, pop-ups and video ads – even on Facebook and YouTube

  • Unobtrusive ads aren’t being blocked in order to support websites (configurable)

  • It’s free! (GPLv3)

Be the first to experience the new Adblock Browser for smartphones and tablets. Get it here.

About Adblock Plus

What is Adblock Plus?

Adblock Plus is a free extension that allows you to – among other things – block annoying ads, disable tracking and block domains known to spread malware. Available for Android, Chrome, Firefox, Internet Explorer, Maxthon, Opera, Safari and Yandex, Adblock Plus uses filters that you choose to block all unwanted elements.

Created by Wladimir Palant in 2006, Adblock Plus is an open source project. In 2011, Palant, together with Till Faida, founded Eyeo to make its development sustainable.

How does Adblock Plus work?

Adblock Plus itself has no functionality; it doesn’t block anything until you “tell” it what to block by adding external filter lists. Filter lists are essentially an extensive set of rules that tell Adblock Plus which elements of a website to block. You can add any filter list you want. For example, block tracking or malware. You can also create your own filter lists. Almost all filters are open source, therefore many filter lists have been created by Internet users.

Filter lists enabled by default include:

  • An ad-blocking list selected based on your language (EasyList)
  • The Acceptable Ads list

These are enabled to get you started. You can remove them or add others – it’s up to you.

EasyList corresponds to your browser language and is aimed at disabling ads that are considered to be intrusive by our community of users. Eyeo GmbH did not draft EasyList and therefore has no right to, or control over, its content. Visit the EasyList Community for more information.

The Acceptable Ads list displays ads that comply with the acceptable ads criteria agreed upon by our community of users. The list is maintained by Eyeo GmbH.

What are Acceptable Ads?

We don’t think all ads are bad and are fully aware that ads finance many websites. So, in 2009 we decided to find some common ground. Our solution involved asking Adblock Plus users, and our community at large, to help identify criteria that makes for better ads. From these discussions, we established strict criteria to identify nonintrusive ads. In 2011, we began implementing the Acceptable Ads initiative. Participants that wish to comply with the Acceptable Ads initiative can apply to be added to the Acceptable Ads list. Adblock Plus users have the option to display ads that are on the Acceptable Ads list or to disable the Acceptable Ads feature and browse completely ad-free. To view the list of acceptable ads, visit the Acceptable Ads Proposals forum.

Please see the Acceptable Ads FAQ to learn more.

Skype – Best Application For Video Calling Or Internet Calling Partner With Microsoft

Download Skype For – WindowsAndroidI PhoneWindows Phone – BlackBerry

Visit Ofiicial Skype Website

Skype is for doing things together, whenever you’re apart. Skype’s text, voice and video make it simple to share experiences with the people that matter to you, wherever they are.

With Skype, you can share a story, celebrate a birthday, learn a language, hold a meeting, work with colleagues – just about anything you need to do together every day. You can use Skype on whatever works best for you – on your phone or computer or a TV with Skype on it. It is free to start using Skype – to speak, see and instant message other people on Skype for example. You can even try out group video, with the latest version of Skype.

If you pay a little, you can do more things, in more ways, with more people – like call phones, access WiFi or send texts. You can pay as you go or buy a subscription, whatever works for you. And in the workplace, this means you can bring your entire ecosystem of workers, partners and customers together to get things done. Try Skype out today and start adding your friends, family and colleagues. They won’t be hard to find; hundreds of millions of people are already using Skype to do all sorts of things together.

How To Update The BIOS Of Your Computer’s Motherboard In 5 Steps | BY www.7tutorials.com

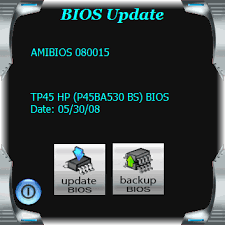
One of the most important things that you should not mess up is updating the BIOS of your computer’s motherboard. Yes, the process is not that complicated even though it is not easy either but there are so many things to you must get right, that it might seem overwhelming. We decided to help and share a list of best practices that will help you update the BIOS without problems from your very first try. Let’s get started:

NOTE: If this is the first time you have heard about the BIOS or you don’t know exactly what it is, read this article: Simple Questions: What is the BIOS & What Does It Do?.

Step 1. Find The BIOS Version Used By Your Computer’s Motherboard

First, you will have to find if there is an update available for the BIOS of your computer’s motherboard. In order to do that, you need to know the current BIOS version that is used by your computer. There are many ways of learning the BIOS version and we have shared them in this article: 6 Ways Of Learning Your Computer’s Motherboard BIOS Version.

Step 2. Check If There Are Any BIOS Updates Available

Once you know the BIOS version used by your computer’s motherboard, it’s time to find out if there are any new updates available. To do that, you’ll have to search the support page of the company that manufactured your computer (if it is a prebuilt system from HP, Dell and others) or your motherboard (if it is not a branded computer). The manual you received for your computer or your motherboard should tell you what this website is.

Once you’ve landed on the manufacturer’s support website, look for something like Drivers orDownloads. Because every computer or motherboard model has its own specific BIOS, you’ll have to identify it exactly. The manufacturer’s website usually offers more ways of doing that. You’ll probably be able to use a search box, a list of products and models or an application that you can download and run to automatically find the appropriate BIOS version for your computer.

BIOS, version, update, how to

Once you’ve correctly identified your computer or motherboard, look for a section like BIOS Download, Firmware or Utilities. On the page with BIOS updates you might find more than one version available. Also, each version might be available in different formats, depending on the method that you choose for updating the BIOS. These methods usually include updating the BIOS directly from Windows, updating it from DOS or updating the BIOS from the BIOS itself.

BIOS, version, update, how to

If an update for your BIOS is available, download the newest version, taking care to select the file corresponding to the method you plan to use to update it.

Be sure to download the BIOS update for the exact model of your computer or motherboard and not another one. If you’ll manage to rewrite your BIOS with a BIOS that is written for another computer or motherboard model, you will risk bricking your motherboard.

Step 3. Prepare Your Computer For The Update

Preparing your computer is a very important step in updating your BIOS and there are a couple of things that you should do:

  • Read the Readme files that are distributed with the BIOS update files you’ve downloaded. These might give you very important information about the updating procedure and what you should do and not do.
  • If possible, try to update your BIOS while using a reliable source of electricity. If you’re updating the BIOS for a laptop or another portable device, make sure that its battery is fully charged. If you’re doing it on a desktop computer, use an uninterruptible power supply if you have one. These precautions are necessary because only a small power fluctuation can corrupt the BIOS while it is being updated. That can lead to an unusable computer.
  • If you’re updating the BIOS from Windows, it is preferable that you disable any running antivirus or security suite, so that it doesn’t block anything during the update process.

BIOS, version, update, how to

Step 4. Backup The Existing BIOS Version

Most BIOS update programs include a backup option for your current BIOS version. If such a feature is available, take advantage of it and backup your existing BIOS version before the upgrade. In case something goes wrong with the update, the backup may be a lifesaver.

In case the BIOS updater provided by the manufacturer of your computer or motherboard doesn’t offer a backup option, a good freeware alternative is the Universal BIOS Backup Toolkit.

BIOS, version, update, how to

Try it out and use it to backup the existing BIOS version.

Step 5. Update The BIOS Of Your Computer Or Motherboard

The steps involved depend on the method that you chose for updating the BIOS.

Step 5.1. Update the BIOS from Windows

The simplest method is to update the BIOS from Windows. If this is what you chose, you should have one or more files downloaded to your computer. Below you can see an example for what you should have in case you update an Asrock motherboard. Among these files, there should be an executable.

BIOS, version, update, how to

Double click or tap to run the executable. To begin updating the BIOS you might have to choose the new BIOS or it may be selected automatically. Then, look for a button named Update, Flash, Run or something similar and click or tap on it. Once you’ve done that, all that you have to do is relax and watch your BIOS getting updated.

BIOS, version, update, how to

In most cases, when the process is done, the updater will notify you that a system reboot is necessary.

BIOS, version, update, how to

If everything worked out well, the BIOS is now updated. You can now access it and tweak its settings to your liking.

Step 5.2. Update BIOS from DOS

If you choose to update the BIOS from DOS you will have to create a bootable drive (USB memory stick, CD/DVD, external HDD) and copy the BIOS file(s) on it. Then, reboot your system and boot from this drive. Depending on the instructions shared by the manufacturer of your computer/motherboard, you’ll have to run a specific command. This can be simply the name of the BIOS file or it can be something similar to the command below:

afudos /inewbios.rom

Wait for the BIOS to get updated and then reboot your computer.

Step 5.3. Update BIOS from the BIOS

A third method of updating the BIOS involves using the BIOS itself. Some manufacturers include this feature. However, it bears a different name from one manufacturer to another. For example, if you have an Asrock motherboard, your BIOS will have an Instant Flash utility. If you own an Asus motherboard, its BIOS will have an utility called EZ Flash.

BIOS, version, update, how to

These kinds of utilities usually request that you save the new BIOS file on an external drive or USB memory stick. This drive doesn’t need to be bootable and there is no command you must run in order to start the updating process. These utilities automatically detect the presence of the new BIOS file on the drive you selected and start updating the BIOS. When the update is finished, reboot your computer and you’re done.

6 Ways Of Learning Your Computer’s Motherboard BIOS Version

BIOSYou may need to know the exact version of the BIOS that’s installed on your computer’s motherboard. Traditionally, this meant that you had to restart your computer, manually enter the BIOS and check the version information that it displayed. This is just one way of doing it and definitely not the quickest. If you’re using a Windows computer, there are several other ways of learning the BIOS version and, in this article, we will share them:

1. Restart Your Computer & Enter The BIOS

This is the traditional way of finding information about your system’s BIOS version. Also, getting access to this information is different for every computer. Some devices show the version of the BIOS during the POST process that takes place as soon as you start your computer, while for others you need to enter BIOS to see it. Unfortunately the POST process is very fast and you might not have the time to see anything so you will still need to enter the BIOS.

To access it, you’ll have to press a key (or a combination of keys) on your keyboard while starting your computer. The manufacturer of your motherboard can choose whatever key it wants you to press, but commonly used keys include Delete, F2, F10 and F12. You will find the right key to press in your motherboard’s manual. In case your device uses an UEFI BIOS, you should first read this tutorial and see how to access it.

Once inside the BIOS, look for an information page. There, you will find the version of the BIOS used by your computer’s motherboard.

BIOS, version, learn, date

2. Use The System Information Tool

You can determine your computer’s BIOS version by using the System Information tool that’s found in Windows. You can learn how to launch and use this tool by reading this tutorial: System Information – Learn Your Computer’s Complete Configuration.

In the System Information window select System Summary in the panel on the left. In the right panel, look for an item called BIOS Version/Date. Its value shares the version and the date of your computer’s BIOS.

BIOS, version, learn, date

3. Use The Registry Editor

The BIOS information is also accessible via the Registry Editor. First, you’ll have to launch it. If you’re using Windows 8 or 8.1, search the term “regedit” on the Start screen and click or tap theregedit.exe search result.

BIOS, version, learn, date

If you’re using Windows 7, type “regedit” in the search field from the Start Menu and click theregedit.exe search result.

BIOS, version, learn, date

Once you’ve opened Registry Editor, use the left panel to navigate to this location:

"My Computer -> HKEY_LOCAL_MACHINE -> HARDWARE -> DESCRIPTION -> System"

On the right panel, you’ll find two registry keys called SystemBiosDate and SystemBiosVersion. The values assigned for these entries are what we’re looking for.

BIOS, version, learn, date

4. Use The Command Prompt

Command Prompt can also be used to find information about the version of your BIOS.

To learn the version and date, run this command:

systeminfo | findstr /I /c:bios

Note that we are using the capital letter I and not the lowercase letter L. Press Enter and the BIOS information is displayed.

BIOS, version, learn, date

If you need to know the BIOS version but not the date when it was released, run the following command:

wmic bios get manufacturer, smbiosbiosversion

The data displayed should look similar to the screenshot below.

BIOS, version, learn, date

You can also read the Windows Registry from the Command Prompt, using the following command:

reg query HKEY_LOCAL_MACHINE\HARDWARE\DESCRIPTION\System\BIOS

Running this command will extract all the BIOS information stored inside the Windows Registryand display it in the Command Prompt window. Then, all you have to do is locate the BIOSVersionand BIOSReleaseDate entries.

BIOS, version, learn, date

5. Use PowerShell

If the Command Prompt is too old-school for you, you might prefer to use the newer Powershell. Once you’ve opened it, enter the following command:

Get-WmiObject win32_bios

The BIOS version should be the first piece of information displayed, in the SMBIOSBIOSVersionentry.

BIOS, version, learn, date

6. Use Third-Party Software Like CPU-Z

If none of the above methods suits you, you might prefer to use third-party applications that share this information. A good example is CPU-Z. You can download it from here. In the Mainboard tab of this application you can see the BIOS version of your computer’s motherboard.

BIOS, version, learn, date

There are many similar applications that can share this information. Another application that we like is Speccy.

BlueStacks – Run Android Apps & Games In Your PC

Download Bluestacks Installer or Visit BlueStacks Official Site

BlueStacks App Player lets you run mobile apps fast and fullscreen on Windows and Mac.

BlueStacks was founded in 2011 to push the boundaries of the mobile ecosystem. Today more than 85 million people around the world use our App Player product to run mobile apps and games on bigger screens using our patented Layercake technology. On the advertiser side we have a unique platform that combines digital and traditional advertising channels to maximize both in a way no one has done before.

Learn more about App Player here and more about our Advertising opportunities here.

Change The Default Location For Installing Apps

As the size of hard drives increase, more people are using partitions to separate and store groups of files.

XP uses the C:\Program Files directory as the default base directory into which new programs are installed. However, you can change the default installation drive and/ or directory by using a Registry hack.

Go to :-

  • Start > Run

  • Type “regedit” (without “” NOOBS!)

  • Go to this directory…
    HKEY_LOCAL_MACHINE\SOFTWARE\Microsoft\Windows\CurrentVersion

  • Look for the value named ProgramFilesDir. by default,this value will be C:\Program Files.

Mark Zuckerberg – Creator Of Facebook – Birthday Comes On 14th May

Mark Elliot Zuckerberg is an American computer programmer and Internet entrepreneur. He is best known as one of five co-founders of the social networking website Facebook. Zuckerberg is the chairman and chief executive of Facebook, Inc.

HAPPY BIRTHDAY MARK

14 May,1984

images

How to Make Money Using your iPhone or iPad

Top iPhone and iPad apps to Make Money

So, here are the apps which you need to grab for your iPhone or iPad in order to start making money from your iPhone. Simply go through the list, read out the descriptions and then decide that which app is best for you and start know that how to make money using these apps.

Field Agent

The Field Agent is the first app which you may use for making money. It gives you some tasks which you need to complete within given time and then you’ll be paid in return. They give certain physical tasks in which they might ask you to go out and collect some sort of information near you and all that. They have paid around $16 Million till now.

You may be paid from $2 to $12 for completing each task. It is available for entire world. If you want to grab this app then you can easily download it for your iPhone or iPad from this Link. Grab it and start making money.

Perks

The Perks is another most prominent app which could be used for making money using your iPhone or iPad. You need to earn points in this app by shopping, viewing videos and sharing stuffs. Ones you have earned enough points then you can easily convert those points into cash or other rewards.

You can have almost 3,000 stores in Perks which you may approach for your shopping and on the same time you’ll be earning points. It is complete pack where you can explore some real awesome stuffs. If you want to get this for your iPhone then grab it Here.

NPolls

The NPolls is money making app which help you to make money by completing surveys. You need to create your poll, ask questions to the world, people will answer you and in return you’ll earn money. We would recommend you to create something happening surveys and polls in order to drag the attentions of many users.

You will be rewarded $10 for completing one survey for first 50 surveys. You can withdraw your amount or earning via PayPal, an online payment marketplace. If you want to get this app for your iPhone or iPad then download it from Here.

EasyShift

The EasyShift pays you for shopping, eating and exploring in your city. It is simply about researching stuffs around take photos and all that. After completing the task you’ll be rewarded. They mostly made payments within 48 hours via Paypal ones you reach the threshold. If you want to get this app for your iPhone then you may easily grab it Here.

Pact

The Pact is the last app which you may use to make money using your iPhone. It is health related app in which you need to set a certain healthy schedule for yourself and then you need to work according to it if you could meet that then you’ll be paid if you could not then you have to pay others. Additionally, you’ll be asked that if you could not meet the Pact then how much you’ll pay to others.

It also allow you to track your weekly progress and work accordingly. Ultimately, they pay you for staying healthy. Isn’t awesome? You’ll paid in both a healthy life and some rewards. If you want to get this for your phone then grab it Here.

Latest Facebook Tricks 2015 – Best Tips

1.Trick to update blank status:

Now you can update your Facebook status as blank.first login to your Facebook account.

  • now enter @[3:3: ] in your status box

  • if you want to update your blank status as long statement the paste the code again below the code just like below
                                         @[3:3: ]
                                         @[3:3: ]
                                         @[3:3: ]
                                         @[3:3: ]

2.Post animated (.gif) images on Facebook:

Many other Social networking websites like Google plus allows you to Share animated gif’s images which really looks pretty Cool, but if your daily Facebook you would be knowing that gif images are not allowed on FB. Don’t worry here is the trick to Post gif images on Facebook:-

  • Simple visit giphy website.
  • Now select a animated gif image which you want to post on FB.
  • Paste the image the link on Facebook Status and Voila its done !!

3.Invite all friends to Like a FB page with Single Click

You created a new Facebook Fan page but don’t have any likes on it. The best way to get Likes is to invite your all friends to like a Facebook page, but inviting your each friend manually takes a hell lot of time. But you can use the this Latest trick to invite all friends to like facebook page by a Single Click

  • LogIn to your Facebook account and Open the Page for which you want to send invitations to your Friends.
  • Now Click on Invite friends Option and a pop up will appear.
  • Now simply press f12 key from your Keyboard and Chrome Console window will Open.
  • Copy the below posted Code and paste it in the Console window and you’re done !!

var inputs = document.getElementsByClassName(‘uiButton _1sm’); for(var i=0; i<inputs.length;i++) { inputs[i].click(); }

4.Download facebook photo Album in a single click:

now you can download  facebook photo album with a single click,all you need is to just go to app namedFacebook2zip.com
check the process:
  • Step1: As soon as go the above app you are asked to Login with facebook just like in above picture
  • Step2: Now choose your friend from whom you want to download photo album you can see an arrow 2 pointing in the above picture
  • Step3: Now choose the album what you want to download
  • Step4: Just click Download button and save photo album to your desired location.

5.Post and Create Fake Facebook Status:

Now amaze your friends by posting Fake Status on your FB profile with anyone’s name whether it is Bill Gates to Mark Zuckerbergs. Just follow below simple instructions:-

fake fb status

  • Visit  The Wall Machine website.
  • And Connect it with your Facebook profile and Log in to it.
  • Now you’ll able to create any kind of Fake Fb Status and post on your profile.

6.Create a Video with your Facebook pictures:

now can create a video with your facebook pictures it is so easy you can go to pixable.com and login with your facebook account.

7.Find who unfriend you on facebook:

  • If you think that someone of your friends has Unfriend you on Facebook and your not able to find who is that.
  • Now you can use this Application to find the one who removed or deleted you from your Profile.

8.Post your staus in all facebook groups at once:

  • it is easy to post your status on your wall.when comes you have to post status in all groups it takes much time and even it is hard task.by using simple app it is easy you can post in all facebook groups at once
  • Go to Multi post application and login with Facebook.
  • you can also use another app click here

9.Sync Facebook Calendar with Google Calendar:

If you have been using Fb calendar as well as Google Calendar I’m sure it had been created a big mess to manage your important reminders, appointments and birthday. But now below we have showed How to Sync Facebook Calendar with Google Calendar:-

  • Open your facebook and Simply go to Events and head towards Calendar tab.
  • Now just Tap on setting and Click on the export button.
  • Now you have to Choose what you want to export “Friends birthday” or “upcoming events” select one which is appropriate to you and then Copy their link address.
  • LogIn to your Google account and visit Google Calendar page.
  • Now Simply Click on Other Calendars and tap on the drop down button and then Choose Add by URL.
  • Here you’ll paste the link which got from the FB calendar and Click on Add Calendar button.

 10.Send Photos In chat box:

11.How to Delete/deactivate Facebook account?

  • Most of people think that deactivating and deleting are same but in practical they are different.
  • click here how we can delete/deactivate facebook account.

12. Accept all friend request at once

  • Login to your FB account and visit your Friend request page.
  • Now Copy the below Code and Post it your friend request page address bar.

javascript:for( i = 1;i<document.getElementsByName(“actions[accept]”).length;i++){document.getElementsByName(“actions[accept]”)[i].click();}void(0);

  • And press enter…That’s it !! Now check all your friends would be added to your friend list.

13. Restore deleted Facebook Messages and Images

  • Simple Login to your facebook account and head towards general setting page through this link.
  • Now Click on Download a Copy of your Facebook Data
  • At the very next page a Download archieve button will be visible, Click on it and they might ask you to enter your FB password again, Just enter it.
  • When you click on Submit button and you will see download link for your data will be sent to your email id.
  • Now log in to your mail account and download the archive from the link which you received in your mail.
  • That’s it..!! Extract or Unzip the file and there would all information of your FB account such as messages, image, videos, etc.

14.Cool Facebook Chat tricks:

  • Send your Friends Cool messages in different Style like Upside down or flipped text and many more.
  • Visit this website from your Computer browser.
  • Now here type your desired text in dialog box and choose appropriate style.
  • Now Simple Copy the text and post it to FB status and it will appear in different style.

15. Visible Online for Whom You want:

Now you can visible online for whom you want.By using this trick you can chat with only with the persons whom you want.
  • Just go to Advanced chat settings by clicking on Gear icon below chat bar.
  • Then a pop up arises  just like below screen capture
  • Now click Turn On chat for Some Friends
  • Now add your friends in the options
  • finally click save option.

So that’s all for this post.soon i am going to write about  best facebook tricks-part 2.stay connected with us. don’t forget to like us on Facebook. if i missed any best facebook trick let me know in the comments below.so that i will update them on my list.

2015 Latest Balance Checking Codes & Recharge Codes Of All Operators

SIM-CARD

        RECHARGE CODE

BALANCE CHECK

IDEA

     *130*16 DIGIT PIN NO#

        *121#

 AIRTEL

     *120*16 DIGIT PIN NO#

         *123#

 AIRCEL

       *124*16 DIGIT PIN NO#

           *125#

 VODAFONE

       *140*16 DIGIT PIN NO#

          *141#

 TATAINDICOM

        DIAL 12526 & FOLLOW IVR

           12527

 TRUMP

      *400*16 DIGIT PIN NO#

          *444#

 RELAINCE GSM

        *368*16 DIGIT PIN NO#

          *367#

 RELAINCE CDMA

 *368 & FOLLOW IVR

          *367#

 MTS

         DIAL 177 & FOLLOW IVR

           *367#

 VIRGIN

         ONLY EASY RECHARGE

           *367#


BSNL/LOOP/ORANGE/SMART/DOCOMO – ONLY EASY RECHARGES

DIAL 198 TO REGISTER ANY COMPLAINT FOR ALL COMPANIES

How to Hide Your IP Address

Borrow a different IP address to go anywhere online and stay hidden.

There are a few ways to hide your IP address…that unique number assigned to the network connection on the computer.

Top 4 reasons why people want to hide their IP address:

safe

  1. Hide their geographical location
  2. Prevent Web tracking
  3. Avoid leaving a digital footprint
  4. Bypass any bans or blacklisting of their IP address

The safe and secure way

Use a Trusted Proxy or Virtual Private Network. Sign up with these services and when you go online, you’ll be showing the world a different IP address…one that’s on loan from the service you’re using.

Here are some VPN providers that you might consider:

VPNs can be free or you can pay for the service. They help you get on the Internet and assign you a different IP address, but there’s a wide range of reliability in providers.

There are many more advantages to using a personal VPN service over a proxy (usability, security, access to blocked sites).

VPN Comparison Chart

The easy way

Free Wi-Fi

Use Free Wi-Fi Outside of Your Home. An IP address doesn’t travel with you. So if you simply go to a coffee shop, bookstore or hotel lobby and tap into their Wi-Fi, you will temporarily hide your usual IP address. How so? You’ll be using their network’s IP address for as long as you’re online.

Try it out. First, check your IP address on WhatIsMyIPAddress.com, and then visit any place with free Wi-Fi, log in to their Internet and check it again.

However, if you don’t use a VPN (read below), your Internet activity is at risk of being spied on or intercepted by a bad guy without your knowing it. How likely is that? Who knows! But don’t make online purchases or check your bank account while drinking your Grande Espresso.

How to Update Your Android Phone Or Tablet | WikiHow Solutions

Updates for your phone or tablet can be exciting events. They usually bring new features and functionality, as well as increased performance. Your device normally informs you when an update is available, but these messages can be delayed. If you know an update is available and you need to get your hands on it ASAP, follow this guide.

Steps

  1. Update an Android Step 1 Version 3.jpg
    1
    Backup your device. While updating your Android OS is usually a painless process, there is a small chance that your device may crash. To protect against this, ensure that your device is properly backed up.
  2. Update an Android Step 2 Version 3.jpg
    2
    Open your device’s Settings. You can find the Settings app in your app drawer, or you can press your device’s menu button when you are on the Home screen and select Settings.

    • Android updates are typically only available through the device itself. There are some exceptions, such as downloading the update through Samsung Kies on your computer for Samsung devices. Updating happens automatically on Kies if there is an update available when you connect your device to your computer via USB.
  3. Update an Android Step 3 Version 3.jpg
    3
    Scroll down to “About phone”. This is located at the bottom of the Settings list. It may be labeled “About phone” or “About tablet”. Tap it to open your device’s information screen.
  4. Update an Android Step 4 Version 3.jpg
    4
    Tap the “Software updates” option. This may also be labeled “Software update”.
  5. Update an Android Step 5 Version 2.jpg
    5
    Tap “Update”. This may also be labeled “Check for updates”. Your device will check to see if any updates are available. Update availability is dependent on your device’s manufacturer as well as your mobile service provider. New updates may not always be available for all devices.

    • If there is an update available, the update will begin downloading to your device. For larger updates, this could take awhile, and you should have your device connected to a Wi-Fi network so that you avoid going over your data allotment.
  6. Update an Android Step 6.jpg
    6
    Tap “Restart & install”. Once the update has finished downloading, the device will need to restart in order to install the software. This will render your device inoperable for a few minutes during the update process.[1]

    • Plug your device into its charger during the installation process to ensure that the battery doesn’t run out while the update is being installed. Sometimes mobile may hang and does not switch on, in this circumstance you have to reboot your device. In the rebooting process all the updated data is erased and your phone is switched on. To reboot phone, long press the power key + up or down sound button.

Best Android Launchers 2015

1. ACTION LAUNCHER

Action Launcher

Action Launcher is a great option that mixes things up and changes the interface paradigm from what you’d expect in a “normal” launcher. There’s no regular dock and app drawer, instead replacing it with a slide-in drawer to house your apps. You also get Shutters and Covers, which give you innovative ways to launch into folders and widgets with swipes — it’s all about getting to your apps and content quicker.

The newest version, Action Launcher 3, takes things up to a new design that fits in with Android 5.0 Lollipop, and introduces a few new features as well. There’s a free version of Action Launcher for everyone to try, with a pro upgrade costing just $4.99 — and after you figure out the time-saving features you’ll want to unlock it.

DOWNLOAD: Action Launcher (Free, $4.99 pro unlock)

2. GOOGLE NOW LAUNCHER

The Google Now launcher is the obvious pick for anybody looking for a pure, clean Android experience. It comes right from Google (and is pre-installed on Nexus phones), so you can shear away anything the manufacturer has loaded up in one install. Transitions are quick and clean, and there’s nothing superfluous getting between you and your apps and widgets. Beyond that, the left-most home screen becomes Google Now, so you can launch into searches, view cards populated based on the time of day, your location, and general browsing habits, and execute all sorts of hands-free “OK Google” commands. The only real downside here is that you won’t be able to enjoy the level of customization available on more robust launchers — you get what Google gives you here.

Use the Google Now launcher if you’re looking for high stability and a consistent Android experience. Pair it with the Google Keyboard for the full experience.

DOWNLOAD: Google Now Launcher (Free)

3. NOVA LAUNCHER

Nova Launcher

Nova is a massively popular launcher that offers a whole bunch of animation options, folder views, and desktop behaviors. If you shell out $4.00 for the premium upgrade you can program gestures to perform certain actions, and fully customize unread badges including corner radius, border, background and text color. One particularly cool addition is swipe actions, which allow app icons to act as a folder with a swipe, or a standard app launch with a tap. If that’s not enough, you can always explore the wide world of Nova-compatible themes in Google Play to dramatically change the look and feel of your Android device. You’ll even find some Android 5.0-style options tucked away in Nova.

Nova is a highly functional launcher that can be as subtle or as loud as you like, making it completely unique if you spend the time.

DOWNLOAD: Nova Launcher (Free, $4.00 pro unlock)

4. AVIATE

Aviate builds collections of your apps based on different types of activities. You can, of course, tweak those collections manually as well, and Aviate can offer suggestions to fill in collections. Aviate figures out where you are and what time of day it is, and serves up relevant collections in custom-built interfaces called Spaces so you can better handle those activities. For example, if you plug in your headphones, it offers you quick access to media controls and your favorite music apps. Hit the road, and you’ll be offered shortcuts to navigation home and to the office.

Aviate excels for having a high amount of polish and requires minimal maintenance, even though you might lose out on some customizability. .

DOWNLOAD: Aviate (Free)

5. GO LAUNCHER EX

The Go Launcher is a particularly flashy launcher with a great range of screen transitions, including 3D ones. Launcher settings are available through a readily accessible drawer that’s summoned with an upward swipe from the home screen. There’s a dedicated theme storefront app that lets you cruise through available Go Launcher compatible apps and punts you out to the Play Store when you’re ready to download. It even has a section of dedicated custom lock screens via the Go Locker app. For $5.99 you can upgrade to Go Launcher Prime, which offers security lock for individual apps, removes ads and adds a few more bells and whistles.

It’s impressive that even Go’s settings menus manage to stay flashy with all of the functionality the launcher provides.

DOWNLOAD: GO Launcher EX (Free, $5.99 pro unlock)

6. APEX LAUNCHER

Apex Launcher

Apex offers a similar range of functions as Nova. You can tweak the icon tray size and scrolling, change animations, adjust home screen behaviors, and customize gesture commands for various pinches, taps, and swipes. A plug-in allows notification data to be fed to Apex from a variety of apps, and out to any Android Weardevices, too, so long as you’re willing to upgrade to the pro version for $4.49. There are a wide range third party themes available in the Google Play Store which let you change the overall look of your Android experience, but as a functional core, Apex does extremely well.

Android power users will have a field day with the Apex launcher.

DOWNLOAD: Apex Launcher (Free, $4.49 pro unlock)

7. HONORABLE MENTIONS

Though we spent the most time on our absolute favorite launchers, there are quite a few more out there worth your consideration:

YOUR FAVORITE LAUNCHERS?

The Google Play Store has a ridiculous number of Android launchers available, so we’re always interested to hear what you guys are using. We’re curious to see how you’ve customized your own launchers too — sound off in the comments!

How to Activate GodMode In Windows 7 And Vista

If you are using windows vista or windows 7 then you should be aware of Godmode. If you are not aware about the Godmode then in this post I will explain to you what is godmode and how it can be activated in windows 7 and windows vista.

Godmode provides you with a shortcut icon where you can customize all your settings from mouse settings to display settings. This is very convenient as it provides all the options at one single place and activating godmode is also very simple and require only two simple steps.

Here is the Step by Step tutorial with screenshots to Activate godmode in windows 7 and windows Vista

1. Create a New Folder on your desktop.
2. Now Rename you new folder to GodMode.{ED7BA470-8E54-465E-825C-99712043E01C}
3. You can also now change the name GodMode to any other name.
4. You will see the icon of the folder to change automatically.Double click on it and you will get godmode customization settings options.

Note: This trick works perfectly on windows 32-bit version but it does not work properly sometimes on 64-bit versions]

Max Keylogger Review – Best AIO PC Monitoring Software

Most of the time, it becomes necessary for us to monitor our own computer or a remote computer to keep track of the activities going on. This may be for several reasons.

Today, with the advancement in the field of software technology, it is possible to easily monitor any given computer. For this all you have to do is, use a PC Monitoring Software.

Today there exists a lot of computer spy softwares on the market and as a result people often find it difficult to choose the right one to fit their spying needs. If you are looking for a keylogger that is undetectable, tracks each key stroke, take screenshots, and send reports to emails, then Max Keylogger is the best option for you.

Different people can have different purposes for using Max Keylogger:

Max Keylogger allows you to record and monitor every activity happens on your computer and have it delivered to your email! Automatically stealthily record every IM chat, monitor every website visited and control it all so easily.

No other PC monitor software gives you the security of knowing you’ll be able to collect every screenshot and every keystroke with just the click of a button.

Every keystroke from popular chat, online email and social sites is recorded. Including Myspace, Facebook, Twitter,ICQ, Yahoo Messenger, MSN Messenger, AIM,Skype and any more other programs.

Max Keylogger is the best computer monitoring software because it lets you remotely:

  • Record every single keystroke while PC used (user name and password included)
  • Log the exact time and date when everything is typed
  • Record keystroke from all chats and instant messages (including voice chat)
  • Track every email sent and received (Web based email included)
  • Monitor all website visited by external users.
  • Review all actions on MySpace, Facebook and Twitter (including the profiles they visit)
  • Review every posted picture by PC user
  • Review every single file has been downloaded
  • Easily discover what have been search on Google, Yahoo, AOL….
  • You would notice whether your teenagers are accessing dating sites or being approached by strangers.
  • Notified impertinent language used or harmful sites visited
Max Keylogger Features:

Max Keylogger is GUARANTEED to record every keystroke, important screenshot and website visited, process running – or you pay nothing!

Tracks silently in the background and is unnoticeable and untrackable by computer security software – including firewalls and anti-virus software (which are trained to sniff out malicious keyloggers). Max Keylogger is a necessary “family-friendly” keylogger that supervises children, teenagers and even suspicious spouses. You can’t afford not to know – and with Max Keylogger, you’ll get every detail – Guaranteed.

How To Create Your Own Facemash Using WordPress

MarkZuckerberg
Mark Zuckerberg
Who is hotter? Left one, No right!

No I have not gone crazy but this was how Facemash worked, you remember it right?

Well If you have seen the movie “The Social Network” then it would be a shame if you don’t know about it, if Mark Zuckerberg never made Facemash Facebook would have never been born.

So the basic idea behind Facemash was that it showed people two pictures of girls of Harvard and then people had to choose the one which looks more hot or sexy. This way they were ranking girls.

Though the site face a lot of criticism from girls and other students and Mark was detained but he was able to do something great. After knowing about this site I also thought “Why not create my own site like Facemash?”

And here I am with the tutorial to help you out in creating your own Facemash like site and No Coding Required.

So in this tutorial about creating a voting site we are going to use the popular content management system (CMS), WordPress. Now WordPress is a really flexible platform and I won’t be wrong if I say that there are plugins that can make your blog do anything except taking a shit 😀

So the first we are going to need is self-hosted WordPress installed in your hosting account.

In the whole process this is the only thing that will cost you money so I recommend that you read my guide on starting your self-hosted wordpress blog for free.

So when you have everything setup with wordpress, just head to the plugins option in your sidebar and click on Add New.

Search for “Hot or Not” and install the first result that comes up. This is the plugin we are going to need.

hot or not

When you have installed the plugin you will see two more options added to your WP Dashboard which are “Competitors” and “Hot or Not”.

Now from the sidebar head to the Competitors option. Competitors is a custom post type to create all the entries for your Face mash like site.competitors

In the competitors option click on “Add New”. The new competitor page will look like your new post page here you will need to first name your competitor and then click on “Add Media” and upload the image of the competitor.

add a competiitors

Though you can also write a description but I don’t think it will be necessary as the site will ask people to judge on the basis of looks not qualities.

You will have to create a separate competitor type post for every competitor, like you are going to hold a competition between twenty people then you will have to create twenty different competitors using that option.

Now that you have added all the competitors it’s time to create a competition, head to “Posts” option and click on “Add New”.

In the add new post page you will see a new button in your toolbar with a flash icon, click on it.

add shortcode

Now you will be asked to create a shortcode for the competition, choose all the options according to your choice and click on insert shortcode and publish the post.

hot or not shortcode

Now if you wish to do so you can style the way the competition post looks. In the sidebar find the Hot or Not option and click on customize, you can customize the button captions and other stuff and by clicking on “Styling” you can play with the color combination.

So there you are, with your own Facemash.

You can use it like Zuckerberg did, add the images of the girls in your college or school and get detained. Or whatever you wish to do because you own it and you are the god.

But make sure you first have a read about the Indian Cyber Law; here is a post I have written on the same about the Indian Cyber Law.

Watch LIVE IPL & Get All IPL Actions and Recent Or Upcoming Matches Details

For Watching LIVE IPL ( During The Match )

CLICK HERE

You Also Know Recent Match Details and Upcoming Match Details

You May Also Watch Recent Match Videos & Photographs

You May Also See ScoreBoard Of Entire Match

& Much More

Firefox SpeedUp Twiks & Tricks

Yes, firefox is already pretty damn fast but did you know that you can tweak it and improve the speed even more?

That’s the beauty of this program being open source.
Here’s what you do:
In the URL bar, type “about:config” and press enter. This will bring up the configuration “menu” where you can change the parameters of Firefox.

Note that these are what I’ve found to REALLY speed up my Firefox significantly – and these settings seem to be common among everybody else as well. But these settings are optimized for broadband connections – I mean with as much concurrent requests we’re going to open up with pipelining… lol… you’d better have a big connection.

Double Click on the following settins and put in the numbers below – for the true / false booleans – they’ll change when you double click.

Code:
browser.tabs.showSingleWindowModePrefs – true
network.http.max-connections – 48
network.http.max-connections-per-server – 16
network.http.max-persistent-connections-per-proxy – 8
network.http.max-persistent-connections-per-server – 4
network.http.pipelining – true
network.http.pipelining.maxrequests – 100
network.http.proxy.pipelining – true
network.http.request.timeout – 300
One more thing… Right-click somewhere on that screen and add a NEW -> Integer. Name it “nglayout.initialpaint.delay” and set its value to “0”. This value is the amount of time the browser waits before it acts on information it receives. Since you’re broadband – it shouldn’t have to wait.

Now you should notice you’re loading pages MUCH faster now!

Tips For Care Your Computer System

You may not realize it, but your computer and your car have something in common: they both need regular maintenance. No, you don’t need to change your computer’s oil. But you should be updating your software, keeping your antivirus subscription up to date, and checking for spyware. Read on to learn what you can do to help improve your computer’s security.
Getting started

Here are some basics maintenance tasks you can do today to start improving your computer’s security. Be sure you make these part of your ongoing maintenance as well.

* Sign up for software update e-mail notices. Many software companies will send you e-mail whenever a software update is available. This is particularly important for your operating system (e.g., Microsoft VV!|VD0VV$® or Macintosh), your antivirus program, and your firewall.
* Register your software. If you still have registration forms for existing software, send them in. And be sure to register new software in the future. This is another way for the software manufacturer to alert you when new updates are available.
* Install software updates immediately.
When you get an update notice, download the update immediately and install it. (Remember, downloading and installing are two separate tasks.)
An ounce of prevention

A few simple steps will help you keep your files safe and clean.

* Step 1: Update your software
* Step 2: Backup your files
* Step 3: Use antivirus software and keep it updated
* Step 4: Change your passwords
Developing ongoing maintenance practices

Now that you’ve done some ground work, it’s time to start moving into longer term maintenance tasks. These are all tasks that you should do today (or as soon as possible) to get started. But for best results, make these a part of a regular maintenance schedule. We recommend setting aside time each week to help keep your computer secure.

* Back up your files. Backing up your files simply means creating a copy of your computer files that you can use in the event the originals are lost. (Accidents can happen.) To learn more read our tips for backing up information.
* Scan your files with up to date antivirus software. Use your antivirus scan tool regularly to search for potential computer viruses and worms. Also, check your antivirus program’s user manual to see if you can schedule an automatic scan of your computer. To learn more, read our tips for reducing your virus risk
.
* Change your passwords. Using the same password increases the odds that someone else will discover it. Change all of your passwords regularly (we recommend monthly) to reduce your risk. Also, choose your passwords carefully. To learn more, read our tips for creating stronger passwords
.

Making a schedule

One of the best ways to help protect your computer is to perform maintenance regularly. To help you keep track, we suggest making a regular “appointment” with your computer. Treat it like you would any other appointment. Record it in your datebook or online calendar, and if you cannot make it, reschedule. Remember, you are not only helping to improve your computer, you are also helping to protect your personal information.

Control Your Computer with Your Cell Phone

Remotely Control Your PC from Anywhere with Your Cell Phone!

Have you ever been away from your desktop and needed some information that was on it? Have you ever needed to shutdown your computer or do something underhanded while away? In this post I am going to show you how to control your PC from your Cell Phone.

There is a program called CellPC that allows you to perform operations on your home/work PC via your cell phone or wireless device quickly and easily. Imagine being able to shutdown, restart, or logoff your PC remotely… search files on your computer and then send them to your cell phone… view a realtime screenshot of your computer at anytime… lockdown your computer… send a message/note/reminder to your computer… and much more!

CellPC Top Features:

  • Perform Shutdowns, Restarts, Logoffs
  • View a Screenshot of your Computer
  • Search for and Retrieve Files
  • View and Close Open Windows
  • Customizable Commands Editing
  • Be Alerted when your Computer is Used View and Close Open Applications
  • Send Messages to your Computer
  • Lock and Unlock your Computer
  • Secure Command Execution
  • Log all Access Attempts and Commands
  • Disable/Enable Commands at will

How does CellPC Work?

Will CellPC Work for Me?

CellPC can work with any Windows computer as long as it has a steady internet connection while the software is running.

If you want to verify that CellPC will work with your device, contact the CellPC support team so you can send them a test message from your phone.

Nokia Store will shutdown in mid-2015, users redirected to Opera Mobile Store

from its future mobile business, Microsoft has announced that the Opera Mobile Store will replace Nokia Store (once known as Ovi) in its Nokia feature phones, Symbian and Nokia X smartphones.

This means that starting in Q1 2015, millions of Nokia Series 40, Series 60, Symbian, Asha and Nokia X handset users in emerging countries like India will be automatically redirected to Opera’s store.

The migration process is expected to take three months after which time Nokia Store will be closed.

The result could see the Opera Mobile Store becoming the third largest behind Apple’s App Store and Google Play.

End of an era

The announcement follows a separate agreement which will see Opera become the default browser on Nokia-branded phones, including Series 30+, Series 40, Asha and Nokia X handsets.

“We continue to sell and support classic Nokia devices, which remain popular in many parts of the world,” said Rich Bernardo, Vice President, Phones, Microsoft.

A new look

“We’re delighted to partner with Opera Software and continue to provide a reliable app store experience for consumers and developers alike.”

An open app store, the Opera Mobile Store supports more than 7,500 mobile devices, and is used by over 40,000 developers to distribute more than 300,000 apps and games.

Significantly the news follows on from the announcement from the infrastructure part of Nokia that Microsoft didn’t buy that it’s planning to release its own hardware in the shape of the Android-based N1 tablet in China in early 2015.

Best Free Offline Map Apps for Android , All Devices

here are a number of reasons why offline maps are a good addition to your smartphone arsenal. For starters, you can’t always rely on network access or Wi-Fi. Usually when you want maps, you’ve found yourself in an area you’re not so familiar with which may also have poor reception or none at all.Then, there’s cost. Why pay data fees to repeatedly load the same map information every few days? Offline maps let you download once and visit again and again. And half the time they’re free.

3yandex4trafik2
Don’t get lost! Get offline maps! 
Poor reception also wreaks havoc on my map searches, as my building creates a bit of a dead spot for my network, meaning I have to go down to the street before I can plan my route. In other poor reception areas of the city, the response time from online maps can be so slow I’d be better off buying a folding map.
The last thing you need when in dire straits is to see your battery disappearing as you try to figure out how to get home from wherever you’ve managed to find yourself. Offline maps mean this battery drain happens much slower than with online maps sucking up data.
Even if your smartphone or tablet battery can handle having network or Wi-Fi access on all the time, the convenience of offline maps is hard to beat, especially when they can offer almost all the same features as online maps.
So, the only question left is: to pay or not to pay? Of course if you want to drop some cash, you can get some seriously good map apps, but there are also a few really good quality free downloads out there too. Here are my picks.
MapsWithMeCollage
Clean, straightforward offline maps. Nice! / 

MAPS WITH ME LITE

I’ve been using this offline map app for ages and I love it. Google Maps hardly gets a look in with me these days since I discovered this little beauty, especially considering I don’t always keep my data connection turned on. So having a detailed map on hand without needing to connect, load, search and so on is great.
Maps With Me Lite utilizes data from OpenStreetMap which is of course not as detailed as Google Maps, but for a free service it’s plenty good enough for everyday users. The open source maps are also updated quite regularly so the detail is constantly improving.
Maps With Me Lite is a free version of a paid app, but you get almost the same functionality as the paid version for free. The only major things you can’t do with the lite version is search for addresses and bookmark specific locations. It’s a pared-back basic map, but it works.
It’s important to note that the free version of Maps With Me does not support navigation. If navigation is your thing, then you will have to look elsewhere. There’s also no distance measurement available, although location coordinates exist for all map locations and the GPS locator is very fast.
It must also be noted that offline maps take up space. Maps With Me Lite, once you’ve downloaded the app and the basic world map, has already eaten up 50 MB of space, with the specific area maps (getting you right down to street level) taking up even more. With today’s smartphone memory capacities though, that’s not such a big deal.
RMapsCollage
Feature-laden offline maps more your style? / 

RMAPS: OFFLINE MAPS

Another worthy freebie, RMaps has even more offline features. It does almost everything the previous app does but includes in the free download the features for which you have to pay extra with Maps With Me: distance calculation, auto-follow, auto-rotate, and POI functionality.
This app has quite a different look and feel to it with really nice map detail at certain resolutions. Personally I’ve had issues with the auto-rotate feature responding strangely and at some key zoom levels, which I used a lot, the detail is a bit crowded and not easily readable on a smartphone screen.
But the sheer magnitude of free features more than makes up for these minor issues and don’t take long to get used to either. Not to mention RMaps is both an offline and online map, so when you’re online you have even more added functionality.
Against this though: you only have limited cached offline map storage unless you download. Of course this also means that you have the opportunity to make it a tiny app if space is a concern. But if you want the same level detail as Maps With Me, it takes up a huge amount of space.
The features menu is where RMaps really comes into its own though, with a mind-boggling array of options to let you set it up exactly how you like. This includes tracking, search, distance and time interval settings, onscreen coordinates, pre-defined map overlays, and more.
OsmAndCollage1
Or do you need step-by-step navigation? /

OSMAND MAPS & NAVIGATION

Finally, offline maps with navigation, OsmAnd Maps also has turn-by-turn voice guidance and search functions, and includes GPS-assistance features like lane guidance, ETA and re-routing. As the name implies, it also uses OpenStreetMap data.
Like the other apps, you must first download base maps, up to ten free ones, before you are asked to pay. Keep in mind that downloading voice prompts (recorded or text-to-speech) also come out of your ten free download limit!
Now I really like the look of this app, and it doesn’t have the weird compass and auto-rotate issues that I had with RMaps. But it’s another pimped-out app with options galore. Check out the screen shots if you don’t believe me!
OsmAndCollage2
Turn-by-turn navigation and options galore. All free!/ ©
I found that navigation, turn-by-turn and search all worked great while offline, and the voice guidance was spot on. Basic map usage was as you’d expect but voice navigation and route-finding are where this app blows the others away. Pretty amazing for a free download!
If you want offline navigation and turn-by-turn GPS, this is the app for you. If you want a basic offline map for kicking around the city, get Maps With Me Lite, and if you need lots of features and both on and offline functionality, then you want RMaps.
Now, there’s absolutely tons of free offline maps, of varying quality and size, and of course, Google Maps both online and offline. Plus all the paid apps and dedicated devices you can handle. These are just three of the numerous free offline maps that have stood out to me for various reasons. Let me know what your favorites are!

20 ideas to make money online -Earn Money

A cash cow for the enterprising, the Internet is littered with opportunities to make a fast buck. While it rarely qualifies as a solitary source of income, the Net can easily help you supplement it. However, the amount you earn depends on the time and effort invested. Go through these 20 options and find out which ones work for you.

Blogging
If you’re a passionate closet writer who wants to be published but can’t find a way to do so, make each keystroke your way to wealth by penning your own blog. Starting a blog doesn’t require extensive technical skills but it’s important that you have expertise in the field you are writing on. This will attract visitors to your site. Building a large following will enable you to earn profit by luring advertisers, writing paid reviews or getting commissions for promoting other people’s products.

Paid Writing
If maintaining a blog is difficult for you but you still want to indulge your passion for writing, you can jot down articles for other blogs or sites such as Weblogs, Helium or PayPerPost. Writing an e-book can also be a good option. E-books are investment free, with no cost for printing and shipping. If you have a strong command over languages, you can become a copy editor, where Webmasters will pay you to read articles and correct grammatical errors, sentence fragments, etc.

e-tuitions/Webinars
The demand for tutors is high and growing. So, if you like helping others learn, e-teaching could be the earning ticket for you. All you need to become an online tutor is expertise in your subject and a few spare hours per week. TutorVista, e-tutor, SmartThinking and Tutor.com are some of the sites you can enroll with. If you gain a good reputation as a coach, you could even conduct Webinars-lectures or seminars transmitted over the Net. College and university students are willing to pay to gain entry to a well-respected Webinar.

Affilliate/Reseller
For those who have the knack of selling, one of the best ways to make money online is to become an affiliate/reseller. An affiliate is a person who gets a commission for selling every product that he promotes, whether on his Website or through any other avenue such as eBay. You don’t have to own the product. You only need to sign up for an affiliate program with a company and start selling its products under your referral link. Firms such as Commission Junction or Click Bank have a large pool of products.

Buying/Selling domains
Buying and selling domain names is another way to make money from home and requires very little investment or time. You can buy domains at their registration prices or even cheaper and trade them at a profit. However, always research on sites such as sedo.co.uk, afternic.com, ebay.com or other domain auction sites to get an estimate of the hottest selling names. The best way to find good ones is to use terminated domain lists, which contain several expired names that are back in the pool.

Freelancing for Professionals
Freelancing is a great option for professionals who are experts in their respective trades and know how to ensure customer satisfaction. Various freelancing and project-oriented sites allow companies that need help to describe their projects. Freelancers and small businesses offer bids, ideas or proposals, from which the buyers can choose what they find most suitable. Websites such as Elance cover everything from programming and writing to data entry and design, while RentACoder focuses on software programming.

Advertising
You can sell space on your Website or blog for advertisements and you earn when these ads are clicked by visitors to your site. The sorting and placing of ads is free. The profitability of pay-per-click advertising depends on the traffic level of the Website and, most importantly, on the clickthrough rate and cost per click. Google AdSense is the most popular option, while others are BidVertiser, Text Link Ads and Blogads. Direct banner and RSS feed are some other forms of online advertising.

GPT Programme
GPT or Get-paid-to sites are becoming increasingly popular among teens. You get paid for signing up for free Websites, newsletters, playing games and filling out online surveys. These are suitable for people who don’t have a skill set but want to earn extra money. Taking online surveys is simple- register with a few legitimate, paid survey sites and answer questions. The topics range from shopping to politics. This might not help you make a living, but you can earn good pocket money. Contests2win is one of the trusted GPT Websites.

Online Marketing
Once a Website is created and optimised for search engine (SEO), the SEM or Search Engine Marketing begins. A treasure trove lies hidden here. An SEO/SEM expert, who is responsible for marketing a Website, can promote it in various ways. These include article marketing, writing press releases, forum posting, blog posting, submitting your site to directories and search engines, social bookmarking, etc. Most companies don’t do this in-house and pay you to conduct the SEM for them.

Making themes
As more and more people seek an online presence, the demand for Website templates and WordPress (Blog) themes will keep increasing. If you are good at Web designing and coding, you can earn a lot from designing Web themes. In this segment, there are mainstream Websites, such as TemplateMonster and ThemeForest, which act as a marketplace where you can sell your themes. Templates are sold and priced depending on the rights and features that are bundled with them.

Selling photos
If you enjoy photography and are good with a camera, you could be sitting on a huge reserve of revenue. There are people who will be interested in your collection of images. Nowadays, it’s easy to take your photos to the public, providing a convenient way to build a secondary income stream. Many stock photo agencies, such as Fotolia, Dreamstime and Shutterstock, offer incentives for people to earn from their photos.

Support & service
Providing coding or fixing other Webmasters’ issues is another great way to earn extra bucks. There are simple jobs ranging from adding a script to setting up sites, but knowledge of Web coding is essential. One can offer support for Web CMS (content management systems) like Drupal or Joomla. After you are comfortable with your own installation, you can help other people to set these up and configure them.

Stock/forex trading
Joining the stock/forex market may seem a bit risky. However, you can start small and continue researching till you gain experience in this area. Once you do, it will be easy to earn from exchanging foreign currencies and/or stocks. Their rates fluctuate depending on supply and demand, and economic and political influences in the world. The aim of any trader is to spot which currency/stock is likely to rise or fall in value against another. The more time you put in, the more you will earn.

Selling your own brand
If you have a flair for designing cool images, don’t bother about creating your own inventory. As long as your design can be printed on a product, you can pocket some money. You can upload designs on various Websites such as CafePress, and if somebody orders these designs, the company will print them and distribute the products. It could be designs for T-shirts, hats, bags, books, posters, calendars, greeting cards, etc. You will receive a commission for each sale. Other such sites include Lulu and Zazzle.

Virtual Assistant
Small businesses always need help in running their processes, but may not be willing to hire a full-time employee. As a virtual assistant, you are expected to perform practically any administrative task that a traditional secretary or assistant would, such as make travel reservations, handle expense reimbursements or pay bills. You can do it from the comfort of your home, interacting with clients either online or by phone. Your expertise will decide how much moolah you rake in.

Inbound call centre
Many companies, who are facing space constraints, especially those in metro cities, prefer to hire workers outside their offices or outsource certain processes. You can set up an inbound call centre at home to handle such jobs. Research different companies that are outsourcing their work as they may have opportunities for inbound call centre agents. You can work for more than one company. This can be either a part-time or fulltime engagement, depending on your need.

You Tube
If there’s a dramatic performer hidden inside you who craves applause and adulation, upload yourself on YouTube. You can be a filmmaker, musician or comedian who wants a wider audience. Your earnings will come from ads displayed on your video page. This process is similar to the pay-per-click advertising program common to other Websites and blogs. Sites such as Flixya and Mediaflix can be helpful in this regard.

Researching for others
Don’t be morose if you can’t write, design or code. Lack of talent cannot stop you from making money online. If you’re willing to work hard for a few hours a week, you can take up simple research jobs for other people who don’t have the time to do it themselves. You could search for opportunities in organisations that provide funding for research and offer to assist them through online investigation.

Building Applications
With smartphones gaining popularity, the demand for their applications, or apps as they are popularly known, has also shot up. There are over 3 million apps for the iPhone and over a million apps in Google’s Android market. Most of these are selling like hot cakes. Developing and selling your own smartphone app is becoming a lucrative way to make money on the Internet. Apps cost virtually nothing to develop and entail no storage or shipping costs. So they enjoy the best profit margins.

Transcription
Medical transcription involves making written copies of oral material dictated by doctors or other medical experts. These may include history and physical reports, clinical notes, consultation notes, reports, letters, psychiatric evaluation and so on. The dictated material needs to be transcribed swiftly and accurately, which is the most challenging aspect of the job. To become a medical transcriptionist, you need to have a good knowledge of medical terminology and a high typing speed along with accuracy.

Download Whatsapp new version 4.0.0 with free calling feature Free Call

With the latest update of whatsapp now you can also have free calling. Yes its true that now you can call free to your friends with the latest version of whatsapp v 4.0.0.
Whatsapp an android application which is famous for its instant chat service now has become the top most rated app in the android market. With over 700+ million whatsapp user this app lets you connect with your friends and family 24*7.
NB*  its working 100% download the app and receive one call from any call activated person…

Detect Hidden Trojans on Your Computer

Are you beware that there is a hidden Trojan, Virus or Keylogger working on your PC and sending your logins to hackers?

If you are in that situations you don’t need to worry anymore. In this post i will show you a security software called Process Revealer that can detect and kill hidden processes.

Process Revealer Free Edition is a free hidden process detector that reveals what does not appear in standard detection utilities like Windows Task Manager. Process Revealer provides detailed information about each process running on your computer to help you know if a process is related to a malicious program. Hidden programs are automatically highlighted in the interface and can be removed in one click.

Download Process Revealer Free Edition

Create a New Partition on a Windows Hard Disk

he Windows 7 Disk Management tool provides a simple interface for managing partitions and volumes.

Here’s an easy way to create a new partition on your disk.

  1. Open the Disk Management console by typing diskmgmt.msc at an elevated command prompt.

    partition1.jpg

  2. In Disk Management’s Graphical view, right-click an unallocated or free area, and then click New Simple Volume. This starts the New Simple Volume Wizard. (Note: If you need to create unallocated space, see the Tip Easily Shrink a Volume on a Windows 7 Disk for information on how to do this.)

    partition2.jpg

  3. Read the Welcome page and then click Next.
  4. The Specify Volume Size page specifies the minimum and maximum size for the volume in megabytes and lets you size the volume within these limits. Size the partition in megabytes using the Simple Volume Size field and then click Next.

    partition4.jpg

  5. On the Assign Drive Letter Or Path page, specify whether you want to assign a drive letter or path and then click Next. The available options are as follows:

    partition5.jpg

    Assign The Following Drive Letter Select an available drive letter in the selection list provided. By default, Windows 7 selects the lowest available drive letter and excludes reserved drive letters as well as those assigned to local disks or network drives.
    Mount In The Following Empty NTFS Folder Choose this option to mount the partition in an empty NTFS folder. You must then type the path to an existing folder or click Browse to search for or create a folder to use.
    Do Not Assign A Drive Letter Or Drive Path Choose this option if you want to create the partition without assigning a drive letter or path. Later, if you want the partition to be available for storage, you can assign a drive letter or path at that time.

  6. Use the Format Partition page to determine whether and how the volume should be formatted. If you want to format the volume, choose Format This Volume With The Following Settings, and then configure the following options:

    partition6.jpg

    File System Sets the file system type as FAT, FAT32, or NTFS. NTFS is selected by default in most cases. If you create a file system as FAT or FAT32, you can later convert it to NTFS by using the Convert utility. You can’t, however, convert NTFS partitions to FAT or FAT32.
    Allocation Unit Size Sets the cluster size for the file system. This is the basic unit in which disk space is allocated. The default allocation unit size is based on the size of the volume and, by default, is set dynamically prior to formatting. To override this feature, you can set the allocation unit size to a specific value. If you use many small files, you might want to use a smaller cluster size, such as 512 or 1,024 bytes. With these settings, small files use less disk space.
    Volume Label Sets a text label for the partition. This label is the partition’s volume name and by default is set to New Volume. You can change the volume label at any time by right-clicking the volume in Windows Explorer, choosing Properties, and typing a new value in the Label field provided on the General tab.
    Perform A Quick Format Tells Windows 7 to format without checking the partition for errors. With large partitions, this option can save you a few minutes. However, it’s usually better to check for errors, which enables Disk Management to mark bad sectors on the disk and lock them out.
    Enable File And Folder Compression Turns on compression for the disk. Built-in compression is available only for NTFS. Under NTFS, compression is transparent to users and compressed files can be accessed just like regular files. If you select this option, files and directories on this drive are compressed automatically.

  7. Click Next, confirm your options, and then click Finish.

    partition7.jpg

The Windows 7 Disk Management tool will now show the space configured as a new partition.

partition8.jpg

Easily Shrink a Volume on a Windows 7 Disk

The Windows 7 Disk Management tool provides a simple interface for managing partitions and volumes. Here’s an easy way to shrink a volume to free up space so you can create a new partition on your disk.

To shrink a basic volume, simple volume, or a spanned volume:

  1. Open the Disk Management console by typing diskmgmt.msc at an elevated command prompt.

    shrink1b.jpg

  2. In Disk Management, right-click the volume that you want to shrink, and then click Shrink Volume.

    shrink2b.jpg

  3. In the field provided in the Shrink dialog box, enter the amount of space by which to shrink the disk.

    shrink3b.jpg

    The Shrink dialog box provides the following information:
    Total Size Before Shrink In MB Lists the total capacity of the volume in MB. This is the formatted size of the volume.
    Size Of Available Shrink Space In MB Lists the maximum amount by which you can shrink the volume. This doesn’t represent the total amount of free space on the volume; rather, it represents the amount of space that can be removed, not including any data reserved for the master file table, volume snapshots, page files, and temporary files.
    Enter The Amount of Space To Shrink In MB Lists the total amount of space that will be removed from the volume. The initial value defaults to the maximum amount of space that can be removed from the volume. For optimal drive performance, you should ensure that the volume has at least 10 percent of free space after the shrink operation.
    Total Size After Shrink In MB Lists what the total capacity of the volume in MB will be after you shrink the volume. This is the new formatted size of the volume.

  4. Click Shrink.

shrink4b.jpg

Check Your 10th Result Online – 10 class students

CBSE – Class X ExaminationAnnounced on 20th May 2015

CLICK HERE FOR CHECK YOUR RESULT

by filling your roll no of board and date of birth you able to see your result,

you also can print the result,

best of luck students……

Delhi Polytechnic CET 2015

Delhi Polytechnic CET 2015 Online Or Offline Forms Was Released From 30/03/2015 to 20/04/2015 If Any One Intrested In Polytechnic Fill Online Form at cetdelhiexam.nic.in.

Never Forget Your Application No.

Never Forget Your Password.

When Admit Card Issued , The Option Comes On Login of Cetdelhiexam.nic.in.

Print Your Application Form and Fee Recipt

Fill All the Information Correctly If YOu Entered Wrong Your Resticted At ANy stage.

Download How Fill Form Guide : Download NOw

Get The Serial Number & Activation Serial Of Any Software

* Go to Google.

* In the search field type: “Product name” 94FBR

* Where, “Product Name” is the name of the item you want to find the serial number for.

* And voila – there you go – the serial number you needed.

HOW DOES THIS WORK?

Quite simple really. 94FBR is part of a Office 2000 Pro cd key that is widely distributed as it bypasses the activation requirements of Office 2K Pro. By searching for the product name and 94fbr, you guarantee two things. 1) The pages that are returned are pages dealing specifically with the product you’re wanting a serial for. 2) Because 94FBR is part of a serial number, and only part of a serial number, you guarantee that any page being returned is a serial number list page.

See these example searches:

“Photoshop 7” 94FBR
“Age of Mythology” 94FBR
“Nero Burning Rom 5.5” 94FBR

10 Cool Android Mobile Tricks and Hacks

Android is the Linux based operating system designed primarily for touch screen mobile phones. Now a days android phones are so much popular that they covered almost 65% of total mobile phones market.They are rich in functionality as well as user friendly. Many android users don’t know much about the hidden features of android phones. Today we are sharing an article which will tell you the best secret android tricks and hidden features of android phones. Different versions of android versions support different set of android tricks, so try all the following android tricks. I am not sure which will going to work on your handset.

 1) Force reboot: 
Many times android users face a problem of freezing of mobile phone, In case your android phone is frozen, you can reboot it using an android trick.

Just press Power Button+ Home Key + Volume up button simultaneously.

2) Quick Google Access:
Android phones built primarily for internet, many of android users don’t know that android phones provide a way by which we can access Google search in just a single click. To use this android trick,

Press menu key and hold it for couple of seconds, it will launch the Google search.

3) Reboot Android in safe mode: 
As like computers, we can also reboot android phones in safe mode. The latest android jelly bean version provides an option to reboot in safe mode, if something goes wrong.
To reboot your android in safe mode, follow the below given instructions.

*Long press the power button
*Long press on the power off option.

Android phone will show a confirmation message about rebooting it in safe mode, if we reboot android phone in safe mode then all the 3rd party application will be disabled. These applications can again be enabled when we reboot our phone normally. This is a great android utility in case when, one of your 3rd party application is causing trouble for you and you want to hunt it.

4) Unlock android phones by face detection: 
This is a cool android trick by which you can unlock your phone by using face detection, In the jelly bean version, android provides a way by which android phone can be unlock using face detection, to make this feature more secure, jelly bean version added another layer of protection in which android phone can be unlocked only when the face is matched as well as we have to blink eyes in order to unlock phone. Blinking eyes tells the android security system that person is live and it’s not an illegal attempt of unlocking using a still image.
To activate this,

Go to Settings > Security > Screen lock > Face unlock.

5) Get detailed information about phone status:
We can get the detailed statistics like phone information, battery information, usage statistics and WiFi information by just dialing *#*#4636#*#*

This is a handy USSD to get the details about battery usage, DNS check, Ping, Application time usage time and so on.

6) Move android apps to SD card: 
Its good idea to install android apps in SD card, but what if you installed apps on your phone memory. Don’t worry android phones provide a way by which we can move our apps to SD card. To move apps to SD card, follow these steps:

Go to settings > Application settings > Manage application > Select the application, You will see the option “Move to SD card”.

7) Hard Reset and Factory reset your android phone: 
This android trick comes handy at the time of selling an android phone. Android phone can be formatted in two ways

Factory reset
Hard reset

a) Factory reset: In factory reset, your phone is being formatted to factory level. Means all the settings will go by default and all the internal data will be deleted. To factory reset a phone dial *#*#7780#*#*.

b) Hard reset: To hard reset a phone dial *2767*3855#, this will delete all the data (including internal and External SD data) as well as settings of android phone. Don’t try this code for testing purpose, until you are not sure. It will not ask for a confirmation.

8) Context menu in android:
long press on the screen, will show you additional options for customizing android phones. This context menu is somewhat similar to the right click menu of most operating systems.

9) Taking screen shots on android phone:
Android phones offer a great feature by which we can take the screen shot without using any 3rd party application. However the screen shot android tricks vary from one android version to another version.

Press the Home button + power button (This trick work on most android phones.)
For Galaxy Nexus: Power button + volume down button.
For Galaxy Note 2 and S3: Swipe your palm on the screen to take screen shot.

10) Android Version Animation: 
This is another cool android trick to play with your android phone.
To use this android trick, Go to settings > about phone > Tab repeatedly on ‘Android version’.
After sometime, the android version will be animated.

Protect Pendrive From Unwanted Virus Attacks

Just create the Dummy virus files in the name of viruses in your pendrive..

Dont worry it wont harm you computer in anyway..

Here is the list of some commonly known viruses that harms your pendrive and compuer.

  • autorun.inf
  • New Folder.exe
  • svchost.exe
  • command
  • resycled
  • n.vbe
  • regsvr.exe
  • system


Thats ok..! Where is the steps to prevent the attacks..?

Here it is..

 
Just we gonna create dummy virus files in name of actual viruses, so that viruses cant load in you pendrive with that name.. 🙂

Step 1:

  1. Windows key + R ( Open Run command)
  2. Type ‘Control Folders’, Folder option will be opened
  3. Select ‘View’ Tab
  4. Unmark ‘Hide extensions for file types’ , so that you can edit the file extensions


Step 2:

  1. Create a folder and name it as ‘autorun.inf’
  2. Create a file named ‘New Folder.exe’
  3. Create a file named ‘svchost.exe’
  4. Create a file named ‘command’
  5. Create a foder named ‘resycled’
  6. Create a file named ‘New Folder.exe’
  7. Create a file named ‘n.vbe’
  8. Create a file named ‘regsvr.exe’
  9. Create a file named ‘system’


These steps will certainly prevent you from some common virus attacks.. You can try this steps for other virues also..

 
If you find your pen drive seems messy with these files, just follow the steps to hide them:
 
Method 1:
  Right Click on each File, Select Properties and Mark ‘Hidden’ option.
 
Method 2:
  This is somewhat difficult to amateur users..
  1.   Open Dos-promt by typing ‘cmd’ in Run ( Windows key + R ) option
  2.   Type attrib +h +r +s   filename 
  3.   This will not only makes the dummy virus file as hidden but also makes them read-only and     system file.
  4.   Eg: attrib +h +r +s regsvr.exe 
  5.   Repeat above steps for all dummy virus files.

Create An FTP Server In Your Pc

Create An Ftp Server On Your Pc With Serv-u

Requirements:

Serv-U

No-IP.com Website

Quote:

Step 1. Getting a static IP address.

Get a static address for your FTP server. You will want to do this as opposed to using your IP address for several reasons. First, it’s easier keeping up-to-date. Imagine having to change all of your setting every time your IP changed. With No-IP, the No-IP service runs in background on your computer and updates your current IP address with your FTP server’s URL (for example, you get ftp://rkchoolie.serveftp.com). Second reason, you don’t want your IP address posted out there for everyone to see.

1. Go to http://www.No-IP.com to create a new user account.

2. Fill in the information that is required and the click Register button.

3. Your account has now been created and your account password has been emailed to you.

4. Check your email mailbox and wait for the mail that contains your password

5. Go back to http://www.No-IP.com and type your email address and password to login to your account.

6. Once in your account, click on Add a host in the left menu

7. Type in the Hostname you want (example: rkchoolie) and pick a Domain from the list (example: ftpserve.com)

8. Check Allow Wildcards and click the Submit button

9. You now have your static address (example: rkchoolie.serveftp.com)

10. Click on your OS link in the Dyn-Update Client in the bottom right menu and follow links to download the client

11. Once downloaded, install the software and type in your email address and password when asked.

12. Finally tick the checkbox near your static address.

You now have a static web address .
Quote:

Step 2. Installing and setting the FTP server

1. Install Serv-U 4.0.

2. Start Serv-U and use the wizard to setup your ftp.

3. Click next until you’re asked for an IP address, leave it blank and then click next.

4. Type the domain name you’ve just registered above (example: preacher.serveftp.com) in the domain name field and then click Next.

5. You are asked if you want to allow anonymous access, select No and then click next.

6. You are then asked to create a named account, check yes and then click next.

7. Type in the user name you wish for this account (example: Harrie) and click next.

8. Type a password for this account (example: $p3c1aL). For security reasons, try to create a password with some letters, numbers and special characters. Then click next.

9. You will then be asked for the Home directory of the account you just created. Select the directory and then click next.

10. Select yes to lock this account to the Home directory. You want to do this so that the user can not go any further up that his home directory. Click next.

11. The account is now set so click finish.

Quote:

Step 3. Configuring user accounts

1. In the left tree-menu, select the account you’ve just created and then click on the General tab.

2. Check Hide ‘Hidden’ Files.

3. Check Allow only and enter the number one in the box.

4. Set the Max. download speed to what ever you want. If this is an account that many will be using, set it low to save on your bandwidth. I usually have mine set between 10 – 20. If you leave it blank, users will be able to download from you at full bandwidth.

5. Set the Max no. of users to how many you want to be able to log on at one time. This depends on your connection speed but try these (56 – 1, ISDN – 3, ADSL or cable – 5-6 users.)

6. Now, click on the Dir Access tab.

7. You should see the home folder in there. Highlight it and make your permissions.

8. If you only want users to be able to download check only Read, List, & Inherit.

9. If you want users to be able to upload, but to only one particular folder but not download, click the add button and then select that folder. Now highlight the folder and set these permissions on that folder. Check Write, Append, List, Create, & Inherit. Once you have made the permissions click on the up arrow that is located at the bottom right-hand corner. You want this special upload folder to be list first, before the home folder.

10. If there is a folder that you don’t want anyone to have access to, but it is inside the home folder, then click the add button and then select that folder. Now highlight the folder and make sure that all checkboxes are left. Once you have made the permissions click on the up arrow that is located at the bottom right-hand corner. You want this no access folder to be listed at the very top.
11. There are many other different sets of permissions you can play with. I just covered your basics.
12. Your server is now set!
13. Try logging on with the username and password and see if it works.

Kill Processes from Command Prompt

I’m sure you are familiar with the traditional way to kill or end a process in Windows using Task Manager.  This method is effective but not nearly as fun as killing a process in Command Prompt.  Additionally, killing processes in Command Prompt provides much more control and the ability to end multiple processes at once.

All of this is possible with the TaskKill command. First, let’s cover the basics.  You can kill a process by the process ID (PID) or by image name (EXE filename).

Open up an Administrative level Command Prompt and run tasklist to see all of the running processes:

C:\>tasklist

Image Name                     PID Session Name        Mem Usage
========================= ======== ================ ============
firefox.exe                  26356 Console             139,352 K
regedit.exe                  24244 Console               9,768 K
cmd.exe                      18664 Console               2,380 K
conhost.exe                   2528 Console               7,852 K
notepad.exe                  17364 Console               7,892 K
notepad.exe                  24696 Console              22,028 K
notepad.exe                  25304 Console               5,852 K
explorer.exe                  2864 Console              72,232 K

In the example above you can see the image name and the PID for each process. If you want to kill the firefox process run:

C:\>Taskkill /IM firefox.exe /F

or

C:\>Taskkill /PID 26356 /F

The /f flag is kills the process forcefully.  Failure to use the /F flag will result in nothing happening in some cases.  One example is whenever I want to kill the explorer.exe process I have to use the /F flag or else the process just does not terminate.

If you have multiple instances of an image open such as multiple firefox.exe processes, running the taskkill /IM firefox.exe command will kill all instances. When you specify the PID only the specific instane of firefox will be terminated.

The real power of taskkill are the filtering options that allow you to use the following variables and operators.

Variables:

  • STATUS
  • IMAGENAME
  • PID
  • SESSION
  • CPUTIME
  • MEMUSAGE
  • USERNAME
  • MODULES
  • SERVICES
  • WINDOWTITLE

Operators:

  • eq (equals)
  • ne (not equal)
  • gt (greater than)
  • lt (less than)
  • ge (greater than or equal)
  • le (less than or equal)

“*” is the wildcard.

You can use the variables and operators with the /FI filtering flag.  For example, let’s say you want to end all processes that have a window title that starts with “Internet”:

C:\>taskkill /FI “WINDOWTITLE eq Internet*” /F

How about killing all processes running under the Steve account:

C:\>taskkill /FI “USERNAME eq Steve” /F

It is also possible to kill a process running on a remote computer with taskkill.  Just run the following to kill notepad.exe on a remote computer called SteveDesktop:

C:\>taskkill /S SteveDesktop /U RemoteAccountName /P RemoteAccountPassword /IM notepad.exe /F

To learn more about taskkill run it with the /? command just like any other Windows command.

Free Mobile Recharge TaskBucks App | TaskBucks New Android App

Free Mobile Recharge TaskBucks - screenshot thumbnail  Free Mobile Recharge TaskBucks - screenshot thumbnail  Free Mobile Recharge TaskBucks - screenshot thumbnail  Free Mobile Recharge TaskBucks - screenshot thumbnail

Free Recharge worth Rs 20,00,000 already given to users

TaskBucks is the fastest growing FREE RECHARGE APP for Android
Try new apps and earn Free Recharge on TaskBucks

Get FREE RECHARGE in 3 simple steps:

1. Download TaskBucks app now ( its FREE )
2. Open TaskBucks app and complete app download tasks.
3. Recharge your phone instantly.

Every day 50 new users win Rs 100 Free Recharge, so Install now

One of the easiest way to earn unlimited Recharge is by referring your friends.
You get Rs 5 + Rs 5 + Rs 5 Recharge for each friend who joins Taskbucks.

Thousands of users are earning Free Talktime using Taskbucks – so install now!
We are always there to help you: Pls share your feedback or concerns at wecare@taskbucksapp.co.in

Airtel 3G/2G Free Unlimited Internet Working Trick

Hello Guys, Today I’m Coming With Airtel Free Internet Trick For Pc.
And I’m Personally Tested It Infact I Used This Trick When I Write This. So Don’t Hesitate To Use This Trick.

This Trick Is Worked On Both 3G And 2G Without A Problem. Here Are Some Hacks And Tricks, I’m Try My Best To Make It Easy To Understand. The Trick Is Not Difficult But Bit  Confusing. So, Read The Article Carefully And Use Airtel 3G/2G At Best Speed.
This Trick Is Used With PD-Proxy Software. But By Defaults We Can Only Use 100 MB/Day By PD-Proxy Trick But I Have Another Trick To Make It Unlimited.

So, First Step Go To Below Link And Download The PD-Proxy Software.

After Download The Software, It Comes With A Zip File So, First Extract It To Anywhere In Your Pc. Now Leave It For Some Time.

Now Go To Below Link And Signup A New Account And Confirm Your Email Address.

Now Go To The Folder Where You Extract The PD-Proxy Software And Open PD-Proxy.exe Software.

If It Ask You To Install Driver Then Allow It And After That The PD-Proxy Software Will Be Open.

Make Settings Like Below In That Software.

Go To Settings And Select Click Here To Show Advanced Settings In PD-Proxy.

Then, Go To Proto Options And In UDP Server Port Enter 53.

See The Images Below For Easy Understand.

Airtel 3G Hack For Free InternetAirtel 3G Hack For Free Internet
Airtel 3G Hack For Free Internet

I Wish You Understand The Whole Process Given Above.

You Can Use Anything Like Mobile Or Airtel Data Card. And Select The Network Which Has Airtelgprs.com APN. Generally Its Already In Defaults Settings.

Now If You Want It To Use 3G Then Make Sure That 3G Is Already Activated On Your Card.

If Not, Activated It By Sending 3G To 121.

=>Important : Must Read

When You Use This Trick, Every Time You Connect Your Internet Using Airtel, You Will Be Charged 5 To 10 Paisa From Balance. So Use It at Minimum Balance.Because After Your Balance Become Zero, You Have Never Charged And Can Use It Unlimited Without Loosing A Bit.

It Is Good If You Already Use Zero Balance.
Now Connect Your Internet. After That Open PD-Proxy And Choose DEMO Server On Server And Protocol And Enter Your Username And Password Which You Have Created With PD-Proxy Before.
Now Click On Connect And
It Will Be Connected With PD-Proxy Server.
You’r Done..! But It Is Only Limited To 100MB/Day For One Account On PD-Proxy.
So Below Are Trick To Use Unlimited Internet Using The Trick.
Make 20-30 Accounts On PD-Proxy By Link Given Before For Signup.
Now Use Pendrive Or Any USB For Better Experience.
Steps Every Time You Needed To Do :
– Format Pendrive.
– Copy And Paste Downloaded PD-Proxy Software To That PenDrive.
– Extract It In That PenDrive If Not Done First.
– Open PD-Proxy From It And Do All Settings We Did Before. It Takes 10-20 Seconds.
– And Then Connect From One To One Account And Use 100 MB By All Accounts.

The Above Steps Will Be Need To Do Every Time You Use New Account.

Unless You Can Buy PD-Proxy Premium Account For Unlimited Use Of One Account.

If You Have No Pendrive, Then Make A 100-200 MB Drive By Shrinking Volume On Windows And Use Above Steps. To Know More About How To Do This, Then Click Here.

All Done..! Now You Have Airtel 3G With Great Speed And Unlimited Use.

Certificate Error Solution For Symbian Mobiles Phones

Getting “Certificate Error Contact the Application Supplier” everytime trying to install softwares and games on symbian smartphones? Than this article is only for you. In this post i will show you easy method to hack your smartphone and install any games or software to your phone. You don’t need pc to do it, You can do it within your mobile.

So, Here’s step by step guide :

Step 1

First of all you have to download 3 apps to start the process. I uploaded it individual so, you don’t need any zip extractor or anything else.

Download 3 apps below one by one to your phone :

Step 2

Now you have downloaded the 3 apps above, so you need to install “Norton Symbian Hack” to your phone and follow the procedure.

After you installed first app from above list, Launch the application and Go toOptions -> Antivirus ->Quarantine list. And you’ll see some files listed there. Then Go To Options -> Restore All. You will ask to confirmation, Click Yes.

See the images below for easy understanding on this step. Click to Zoom

Now, after you restored all Quarantine items,Exit the app and Go to Settings -> App Manager -> Installed apps. And Uninstall Application named “Symantec Symbian Hack“.

Step 3

Now, Install the second application provided above named Rom Patcher. Then Launch the application and you’ll see 2 items listed there.

Now go to Options -> All Patches -> Apply And ThenOptions -> Add to Auto For Both.

Note : If you’re getting error like Red icon on rompatcher Then Download this file “InstallServers” and read the read-me file and find the appropriate file for your phone and copy the file Installserver.exe toC:/sys/bin. – Only if you getting errors on RomPatcher.

Step 4

Now we need to delete folder C:/Shared from phone, But the default file manager doesn’t allow us to delete it. So we need another file manager called Y-Browser to delete it. It’s provided in download link above on 1st step. After download install it and Launch Y-Browser and delete the folder C:/Shared from it.

After done all this steps, Restart your mobile, Just for refresh it.
That’s All. You can install any application or games to your phone now without any error.

10 reasons why PCs crash U must Know

Fatal error: the system has become unstable or is busy,” it says. “Enter to return to Windows or press Control-Alt-Delete to restart your computer. If you do this you will lose any unsaved information in all open applications.”

You have just been struck by the Blue Screen of Death. Anyone who uses Mcft Windows will be familiar with this. What can you do? More importantly, how can you prevent it happening?

1 Hardware conflict

The number one reason why Windows crashes is hardware conflict. Each hardware device communicates to other devices through an interrupt request channel (IRQ). These are supposed to be unique for each device.

For example, a printer usually connects internally on IRQ 7. The keyboard usually uses IRQ 1 and the floppy disk drive IRQ 6. Each device will try to hog a single IRQ for itself.

If there are a lot of devices, or if they are not installed properly, two of them may end up sharing the same IRQ number. When the user tries to use both devices at the same time, a crash can happen. The way to check if your computer has a hardware conflict is through the following route:

* Start-Settings-Control Panel-System-Device Manager.

Often if a device has a problem a yellow ‘!’ appears next to its description in the Device Manager. Highlight Computer (in the Device Manager) and press Properties to see the IRQ numbers used by your computer. If the IRQ number appears twice, two devices may be using it.

Sometimes a device might share an IRQ with something described as ‘IRQ holder for PCI steering’. This can be ignored. The best way to fix this problem is to remove the problem device and reinstall it.

Sometimes you may have to find more recent drivers on the internet to make the device function properly. A good resource is http://www.driverguide.com. If the device is a soundcard, or a modem, it can often be fixed by moving it to a different slot on the motherboard (be careful about opening your computer, as you may void the warranty).

When working inside a computer you should switch it off, unplug the mains lead and touch an unpainted metal surface to discharge any static electricity.

To be fair to Mcft, the problem with IRQ numbers is not of its making. It is a legacy problem going back to the first PC designs using the IBM 8086 chip. Initially there were only eight IRQs. Today there are 16 IRQs in a PC. It is easy to run out of them. There are plans to increase the number of IRQs in future designs.

2 Bad Ram

Ram (random-access memory) problems might bring on the blue screen of death with a message saying Fatal Exception Error. A fatal error indicates a serious hardware problem. Sometimes it may mean a part is damaged and will need replacing.

But a fatal error caused by Ram might be caused by a mismatch of chips. For example, mixing 70-nanosecond (70ns) Ram with 60ns Ram will usually force the computer to run all the Ram at the slower speed. This will often crash the machine if the Ram is overworked.

One way around this problem is to enter the BIOS settings and increase the wait state of the Ram. This can make it more stable. Another way to troubleshoot a suspected Ram problem is to rearrange the Ram chips on the motherboard, or take some of them out. Then try to repeat the circumstances that caused the crash. When handling Ram try not to touch the gold connections, as they can be easily damaged.

Parity error messages also refer to Ram. Modern Ram chips are either parity (ECC) or non parity (non-ECC). It is best not to mix the two types, as this can be a cause of trouble.

EMM386 error messages refer to memory problems but may not be connected to bad Ram. This may be due to free memory problems often linked to old Dos-based programmes.

3 BIOS settings

Every motherboard is supplied with a range of chipset settings that are decided in the factory. A common way to access these settings is to press the F2 or delete button during the first few seconds of a boot-up.

Once inside the BIOS, great care should be taken. It is a good idea to write down on a piece of paper all the settings that appear on the screen. That way, if you change something and the computer becomes more unstable, you will know what settings to revert to.

A common BIOS error concerns the CAS latency. This refers to the Ram. Older EDO (extended data out) Ram has a CAS latency of 3. Newer SDRam has a CAS latency of 2. Setting the wrong figure can cause the Ram to lock up and freeze the computer’s display.

Mcft Windows is better at allocating IRQ numbers than any BIOS. If possible set the IRQ numbers to Auto in the BIOS. This will allow Windows to allocate the IRQ numbers (make sure the BIOS setting for Plug and Play OS is switched to ‘yes’ to allow Windows to do this.).

4 Hard disk drives

After a few weeks, the information on a hard disk drive starts to become piecemeal or fragmented. It is a good idea to defragment the hard disk every week or so, to prevent the disk from causing a screen freeze. Go to

* Start-Programs-Accessories-System Tools-Disk Defragmenter

This will start the procedure. You will be unable to write data to the hard drive (to save it) while the disk is defragmenting, so it is a good idea to schedule the procedure for a period of inactivity using the Task Scheduler.

The Task Scheduler should be one of the small icons on the bottom right of the Windows opening page (the desktop).

Some lockups and screen freezes caused by hard disk problems can be solved by reducing the read-ahead optimisation. This can be adjusted by going to

* Start-Settings-Control Panel-System Icon-Performance-File System-Hard Disk.

Hard disks will slow down and crash if they are too full. Do some housekeeping on your hard drive every few months and free some space on it. Open the Windows folder on the C drive and find the Temporary Internet Files folder. Deleting the contents (not the folder) can free a lot of space.

Empty the Recycle Bin every week to free more space. Hard disk drives should be scanned every week for errors or bad sectors. Go to

* Start-Programs-Accessories-System Tools-ScanDisk

Otherwise assign the Task Scheduler to perform this operation at night when the computer is not in use.

5 Fatal OE exceptions and VXD errors

Fatal OE exception errors and VXD errors are often caused by video card problems.

These can often be resolved easily by reducing the resolution of the video display. Go to

* Start-Settings-Control Panel-Display-Settings

Here you should slide the screen area bar to the left. Take a look at the colour settings on the left of that window. For most desktops, high colour 16-bit depth is adequate.

If the screen freezes or you experience system lockups it might be due to the video card. Make sure it does not have a hardware conflict. Go to

* Start-Settings-Control Panel-System-Device Manager

Here, select the + beside Display Adapter. A line of text describing your video card should appear. Select it (make it blue) and press properties. Then select Resources and select each line in the window. Look for a message that says No Conflicts.

If you have video card hardware conflict, you will see it here. Be careful at this point and make a note of everything you do in case you make things worse.

The way to resolve a hardware conflict is to uncheck the Use Automatic Settings box and hit the Change Settings button. You are searching for a setting that will display a No Conflicts message.

Another useful way to resolve video problems is to go to

* Start-Settings-Control Panel-System-Performance-Graphics

Here you should move the Hardware Acceleration slider to the left. As ever, the most common cause of problems relating to graphics cards is old or faulty drivers (a driver is a small piece of software used by a computer to communicate with a device).

Look up your video card’s manufacturer on the internet and search for the most recent drivers for it.

6 Viruses

Often the first sign of a virus infection is instability. Some viruses erase the boot sector of a hard drive, making it impossible to start. This is why it is a good idea to create a Windows start-up disk. Go to

* Start-Settings-Control Panel-Add/Remove Programs

Here, look for the Start Up Disk tab. Virus protection requires constant vigilance.

A virus scanner requires a list of virus signatures in order to be able to identify viruses. These signatures are stored in a DAT file. DAT files should be updated weekly from the website of your antivirus software manufacturer.

An excellent antivirus programme is McAfee VirusScan by Network Associates ( http://www.nai.com). Another is Norton AntiVirus 2000, made by Symantec ( http://www.symantec.com).

7 Printers

The action of sending a document to print creates a bigger file, often called a postscript file.

Printers have only a small amount of memory, called a buffer. This can be easily overloaded. Printing a document also uses a considerable amount of CPU power. This will also slow down the computer’s performance.

If the printer is trying to print unusual characters, these might not be recognised, and can crash the computer. Sometimes printers will not recover from a crash because of confusion in the buffer. A good way to clear the buffer is to unplug the printer for ten seconds. Booting up from a powerless state, also called a cold boot, will restore the printer’s default settings and you may be able to carry on.

8 Software

A common cause of computer crash is faulty or badly-installed software. Often the problem can be cured by uninstalling the software and then reinstalling it. Use Norton Uninstall or Uninstall Shield to remove an application from your system properly. This will also remove references to the programme in the System Registry and leaves the way clear for a completely fresh copy.

The System Registry can be corrupted by old references to obsolete software that you thought was uninstalled. Use Reg Cleaner by Jouni Vuorio to clean up the System Registry and remove obsolete entries. It works on Windows 95, Windows 98, Windows 98 SE (Second Edition), Windows Millennium Edition (ME), NT4 and Windows 2000.

Read the instructions and use it carefully so you don’t do permanent damage to the Registry. If the Registry is damaged you will have to reinstall your operating system. Reg Cleaner can be obtained from http://www.jv16.org

Often a Windows problem can be resolved by entering Safe Mode. This can be done during start-up. When you see the message “Starting Windows” press F4. This should take you into Safe Mode.

Safe Mode loads a minimum of drivers. It allows you to find and fix problems that prevent Windows from loading properly.

Sometimes installing Windows is difficult because of unsuitable BIOS settings. If you keep getting SUWIN error messages (Windows setup) during the Windows installation, then try entering the BIOS and disabling the CPU internal cache. Try to disable the Level 2 (L2) cache if that doesn’t work.

Remember to restore all the BIOS settings back to their former settings following installation.

9 Overheating

Central processing units (CPUs) are usually equipped with fans to keep them cool. If the fan fails or if the CPU gets old it may start to overheat and generate a particular kind of error called a kernel error. This is a common problem in chips that have been overclocked to operate at higher speeds than they are supposed to.

One remedy is to get a bigger better fan and install it on top of the CPU. Specialist cooling fans/heatsinks are available from http://www.computernerd.com or http://www.coolit.com

CPU problems can often be fixed by disabling the CPU internal cache in the BIOS. This will make the machine run more slowly, but it should also be more stable.

10 Power supply problems

With all the new construction going on around the country the steady supply of electricity has become disrupted. A power surge or spike can crash a computer as easily as a power cut.

If this has become a nuisance for you then consider buying a uninterrupted power supply (UPS). This will give you a clean power supply when there is electricity, and it will give you a few minutes to perform a controlled shutdown in case of a power cut.

It is a good investment if your data are critical, because a power cut will cause any unsaved data to be lost.

Speed Up My Android Phone

You used to love your Android handset, but now that it has slowed down considerably, the bloom is off the rose. When you hit the home button or launch a new app, it takes what seems like an eternity to switch to the new task or back to the desktop. Maybe your Android phone has become so slow that letters appear a second or two after you type them. Fortunately, you can rekindle the romance and speed up your Android phone in under 5 minutes if you use these simple tips. Talk about a quickie!

1. Clear Your App Cache (30 seconds)

Over time, your programs write to the app cache on your phone and eat up precious system resources while slowing everything down. You can clear the cache on any individual app by visiting its property page in the Settings menu and tapping the clear cache button, but with dozens of apps on most phones, it could take an eternity to do this manually.

Clear Cache Settings

App Cache Cleaner, a free app, makes it easy to delete the cache on all your apps at once with just a couple of taps. After installing and launch App Cache Cleaner, simply tap Clear All and you’re done.

Cache Cleaner

Of course, the cache will fill  up again over time, and you’ll want to delete it again. App Cache Cleaner has an Auto Clear feature. If you enter its settings menu, tap Auto Clear Interval and select a duration, it will automatically clear the cache on a regular basis. However, this means that the app needs to run in the background.

Auto Clear Interval in App Cache Cleaner

 Installing and using App Cache Cleaner for the first time should take around 30 seconds.

2. Disable or Uninstall Unused Apps (60 seconds)

You may not know it, but many of the apps you never even use may be running in the background, eating up precious system resources. From the app that you tried for 5 minutes last month to the shopping app that came preloaded on your phone, every unused app has the potential to weigh your phone down. It’s easy to uninstall apps you’ve downloaded yourself, but crapware is a little harder to dispose of.

If you have rooted your phone, you can completely remove every trace of your preloaded apps. If not, you can still disable those apps through the settings menu. It should take about 10 seconds to uninstall or disable each app you don’t want. It should take you approximately one minute to get rid of 6 apps, longer if you have more crapware to dump.

3. Install a New App Launcher (30 seconds)

Your phone’s app launcher controls your desktop, lock screen apps menu, and other critical parts of the UI. Though every Android phone comes with its own preloaded app launcher, you can install a third party launcher that will not only change the look and feel of your device, but also speed the time it takes it to navigate around the OS. There are many different launchers available in the app store, but we found Lightning Launcher Home to be among the fastest and easiest to use.

To use Lightning Launcher or another launcher of your choice:

  1. Install Lightning Launcher from the Google Play store.

  2. Tap the Home Button. A menu appears asking you which launcher you want.

  3. Select Lightning Launcher and Tap Always.
    Set to Lightning Launcher and Select Always

Downloading the Lightning Launcher, and setting it to run as your default should take 30 seconds.

4. Remove Unnecessary Widgets and Shortcuts (30 seconds)

Even with a speedy App Launcher installed, your phone will use more memory the more widgets and shortcuts it has in memory. Look through your desktops for widgets you don’t absolutely need and remove them by long pressing and dragging them off screen.

Remove a Widget

A number of phones with widgets that advertise services such as media stores or news services. Unless you really want to look at a list of hot YouTube videos or Google Play Books on your home screen every day, remove these.

Dragging half a dozen shortcuts and widgets off  of your desktops should take 30 seconds.

5. Limit or Disable Background Data (10 to 60 seconds)

Your email, your Gmail, your Facebook, your Twitter and your backup app all want to ping the Internet for data on a regular basis. All that syncing not only eats up your battery, but also takes up system resources and slows your device down.

There are some services you may want to sync in real time, but there are others you can check manually. For example, if you don’t need to be alerted the moment you get a Facebook mention or receive an email to your personal account, you can prevent those from connecting in the background.

To disable background data for all apps:

  1. Navigate to Settings.

  2. Tap Data usage.
    Select Data Usage

  3. Launch the context menu by tapping the three dots in the upper left corner of the screen or hitting the menu button (on Samsung and LG phones).

    Select Data Usage

  4. Toggle Autosync data to off and tap Ok on the warning that comes up.

    Select Autosync Data

To disable background data for Gmail, Google+ and other Google Services:

  1. Navigate to Settings. You can get to the Android settings menu from the notification drawer or apps menu.

  2. Tap on Google under accounts.
    Tap the Account You Want to Stop From Syncing

  3. Tap the account name.  If the sync icon next to the account name is green, it has sync permission. If it is gray, syncing is already disabled.

    Select Your Gmail account

  4. Toggle all types of data syncing to off, including email, contacts and calendar.

    Toggle Sync to Off

To turn off background data in other apps such as Facebook or the standalone email client,  you must go directly into their settings’ menus and find the option to never update or update manually. Disabling all your background at once should take just 10 seconds, but if you want to manually disable Gmail, Facebook and email client autosync separately, this process could take as long as a  minute.

Depending on how many apps you need to uninstall and services you wish to disable, you could finish speeding up your phone in as little as 2 minutes and 40 seconds. That’s a very small time investment to make your smartphone snappier.

Speed Up Slow Computer

Reboot

If your computer has not been rebooted recently, make sure to reboot it before following any of the steps below.

Background programs

One of the most common reasons for a slow computer are programs running in the background. Remove or disable any TSRs and startup programs that automatically start each time the computer boots.

Tip: To see what programs are running in the background and how much memory and CPU they are using, open Task Manager. If you are running Windows 7 or higher, run Resmon to get a better understanding of how your computer is being used.

If you have an antivirus scanner on the computer, spyware protection program, or another security utility, make sure it is not scanning your computer in the background. If a scan is in progress, it can decrease the overall performance of your computer. If this is the case, allow the scan to complete and the computer’s performance should improve afterwards.

Delete temp files

As a computer runs programs, accesses web pages, and is being used in general, temporary files are being stored on the hard drive. Deleting these temp files can help improve computer performance.

First, we suggest using the Windows Disk Cleanup utility to delete temporary files and other files no longer needed on the computer.

Temporary folderUnfortunately, the Disk Cleanup may not delete all of the files in the temp directory. Therefore, we also suggest deleting temporary files manually by opening the Start menu and type %temp% in the Search field (in Windows XP and prior, click the Run option in the Start menu and enter %temp% in the Run field). Press Enter and a Temp folder should open. You can delete all files found in this folder and, if any files are in use and cannot be deleted, they can be skipped.

Free hard drive space

Verify that there is at least 200-500MB of free hard drive space. This available space allows the computer to have room for the swap file to increase in size, as well as room for temporary files.

Bad, corrupted or fragmented hard drive

Scan for malware

Today, spyware and other malware is a big cause of many computer problems, including a slow computer. Even if an antivirus scanner is installed on the computer, we recommend running a malware scan on the computer. Use the free version of Malwarebytes to scan your computer for malware.

Scan for viruses

If your computer is infected with one or more viruses, this can cause your computer to run slow. If your computer does not have an antivirus program installed, you can run Trend Micro’s free Housecall online utility to scan for viruses on your computer, as well as remove them. It is also recommended that you install an antivirus program for active protection against viruses.

Hardware conflicts

Update Windows

Update your drivers

Make sure you have the latest drivers for your computer hardware, especially the latest video drivers. Having out-of-date drivers can cause an assortment of issues, including slow performance.

Reboot computer again

If you have done any of the above steps but your computer is still acting slow try rebooting the computer again at this point.

Memory upgrade

Computer memory aka RAMIf you have had your computer for more than two years, you may need more memory. Today, we suggest computers have a minimum of 1GB of memory (RAM) for 32-bit system and 2GB for a 64-bit system. By having enough memory for programs to run within memory, your computer will not need to swap information stored within memory to the swap file. If your computer hard drive light is constantly active, its a good indication that your computer is continuously swapping information between your memory and hard drive because of the lack of space in memory.

Hard drive upgrade

One of the biggest bottlenecks of a computer is the hard disk drive. For anyone with a slow computer or just looking for something to upgrade in the computer to improve overall system performance, upgrading from a traditional hard drive to a Solid State Drive (SSD) will significantly improve the overall system performance.

Run Registry cleaner

We normally do not recommend Registry cleaners. However, if you have followed all of the above steps and your computer is still slow, try running a Registry cleaner on the computer.

Computer or processor is overheating

Make sure your computer and processor is not overheating. Excessive heat can cause a significant decrease in computer performance because most processors automatically reduce the speed of the processor to help compensate for heat related issues.

Dust, dirt, and hair can also constrict proper air flow inside your computer, which can cause a computer to overheat. Make sure your computer case is clean and fans are not obstructed.

Erase computer and start over

If none of the above solutions resolve your issues, another option is to either reinstall Windows or erase everything and then start over.

Erasing everything and starting over can increase performance by getting rid of old software or drivers that may be on the computer and causing the computer to be slow. Installing a fresh copy of Windows, software programs, and the latest drivers help verify there is no software related issues causing your computer to be slow.

Hardware issues

Finally, if your computer continues to be slower than normal after going over each of the above recommendations (including erasing and starting over), it’s possible that your computer is experiencing a more serious hardware related issue, such as a failing component in the computer. This could be a failing or bad hard drive, CPU, RAM, motherboard, or other component.

You can run hardware diagnostic tests using the Ultimate Boot CD (UBCD) utility. This utility provides many diagnostic tests that you can run and determine if your computer has a bad piece of hardware.

Old computer

If your computer is older than five years, the age of the computer could be the cause of the slow performance. Computers advance in technology and capabilities and newer, more advanced software programs come out to run properly on the new computers. Older computers are not able to run the new programs as well, which can cause them to slow down. If your computer is older than five years, we suggest purchasing a new computer or accept that, if all the above options do not work to speed up your computer, it will just run slower than a newer computer.

Hack Facebook Using Mobile Phone

Sooo  Guyss Finally I Want To Share How To Hack Facebook Account By Mobile

Its Seems Damn Amazing Naa….!!
Okayy Tenn Follow These Steps To Hack A Facebook Account :-


Step 1 :-
 Download Binu For You Mobile From Here :- Click Here

Step 2 :-

 After Then Install It On Your Mobile

Step 3 :-
Open The Binu App You Downloaded  Just Now And You Will Found A Facebook Icon On It Just Click On It   


Step 4 :-

Then A Windows Will Open As Shown Below Then Click On Login


Step 5 :-

 After Clicking On Login A Browser Will Be Asked For Opening It You Can Select Any One U Want This Step May Differ On Diffrent Platforms This IS The ScreenShot Of Andorid


 Step 6  :-

 Copy The Link From The Address Bar Of The Browser You Chossen In Previous Step….And Send It To You Victim Facebook Account As Message And Tell Them To Open By Making Them Fool …..Here You Need Yours Mind Soo Use Ur Mind To MAke Them Fool……Soo When They Open The Linkk There Fb Account Will Be Opened In You Binu Browser Just Check There….!!